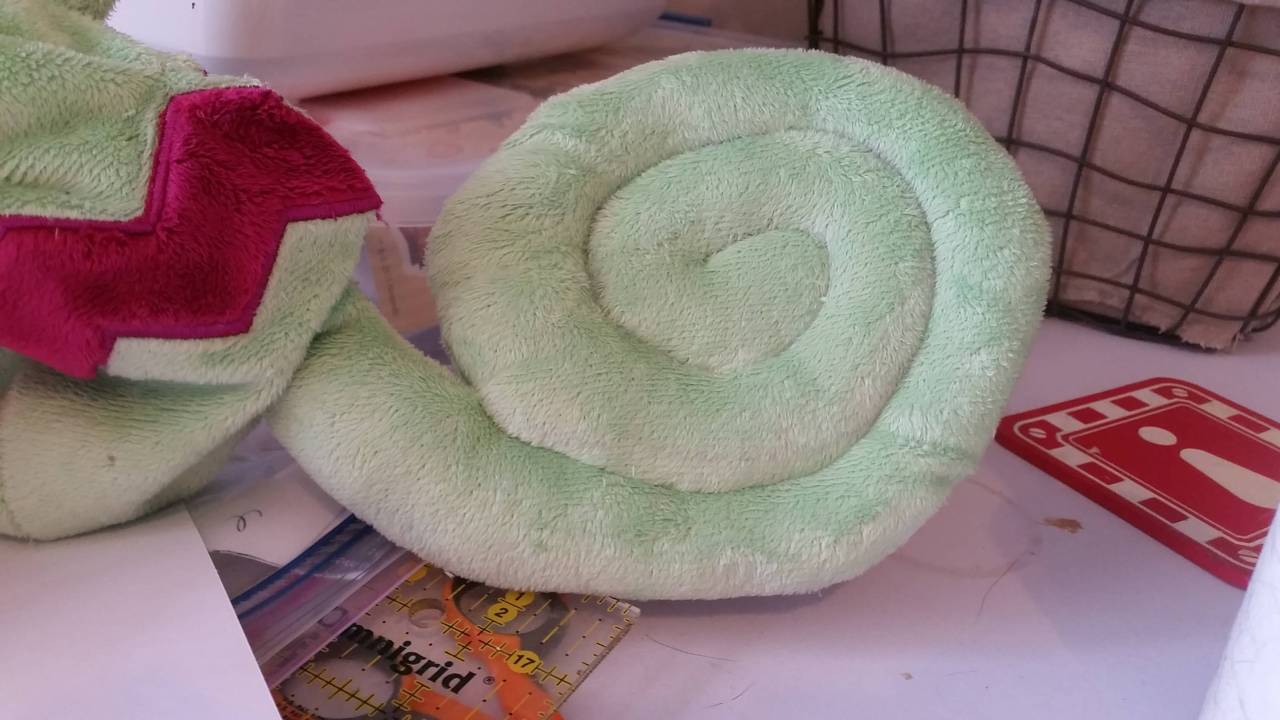
 You can machine stitch objects after they are stuffed to give them dimension. This can be used in a variety of ways - ears, feathers, or tails, as seen here.  Kecleon’s tail was perfect for this technique. If I didn’t choose to approach the tail this way, I would have had to make a long tube, stuff it, roll it up, then hand sew it all together. That is a LOT of work, and I’m not the biggest fan of hand sewing.  Instead, I traced the entire shape of the tail (with some adjustments for plush-ifying, like thickening the area where the tail meets the body).  Sew around the edges and leave one area open for turning. Clip corners and curves as necessary.  Depending on how you are going to attach said item to the plush, you will either want to go ahead and machine stitch it on (as I did here) or move on to the next step if it will be hand-sewn on.  Stuff the item -lightly-. I say lightly because it has to fit under your machine foot. I had to take out stuffing after taking this picture. You want enough stuffing so that dimension will be added after you stitch, but not so much that you can’t fit it under. The “right” amount should be what you can just fit underneath your machine foot. If you don't want such a thick piece, you can also use a couple layers of quilt batting. I've done this for wings in the past.  Trace the design you will be sewing with a water-soluble fabric pen.  Fit it under your foot and sew as normal. This can be a little tough. You can already see dimension where I started the stitch. As you’re going, if you notice areas that need a bit more stuffing, you can stop and add it before you “close off” that area with stitching. When you’re done, clean up the marker and trim the thread where needed. All done! Saved so much time and it looks great!
If you'd like to see more tutorials or have a request for one in particular, let me know!
0 Comments
Leave a Reply. |
Archives
December 2022
Categories
All
|
 RSS Feed