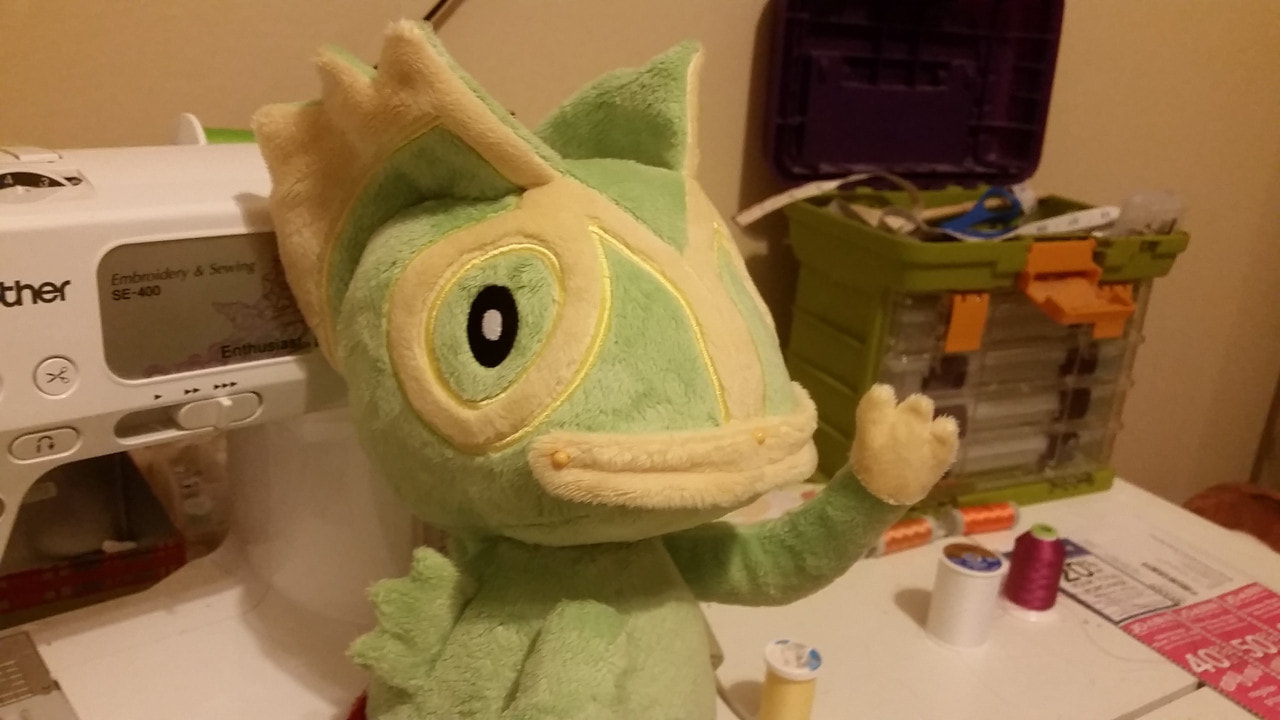
 Jointing limbs on a plush is simple and instantly adds character. It won’t detract from cuddliness and sometimes is even easier than sewing a limb on the normal way! This technique should be used for skinny limbs like arms and some legs. This won’t work for heads, unless the head is extremely small.  Buy a set of plastic doll joints. I buy mine from CR’s Crafts. There are three parts. From left to right: the post, the lock washer, and the washer.  With your cat’s help, determine where you want your joint to be. For arms I place the post in this position, with a bit of room around the circle, kind of like a seam allowance.  Using a water-soluble fabric pen mark where the post itself will come out of the fabric. This is the side of the arm that will touch the body. If you have identical pieces for the front and back of the arm it won’t matter, but Kecleon did not.  This is kind of hard to see, but I like to stitch a circle around the dot to give some stability to the fabric. You’re going to be cutting a hole in the fabric so it will help with any unwated stretching or tearing. I just use a circular stitch that already comes on my machine. If you don’t have one, you can do a zig-zag stitch around it. Cut inside the circle, large enough for the post to slip through.  Sew the arm together as normal.  Take the post and slip it through the hole you made. Stuff the arm. You should stuff the ‘shoulder’ more firmly than the rest of the arm, so it will naturally have some strength to hold itself up.  There are a couple ways to attach the arm to the body. The first is to follow the process described above, marking a dot where the post will enter the body and sewing a circle around the dot then cutting the hole. The second (and in my opinion, preferable) method is to leave a gap in the side seam of the body. That means no cutting holes, so the fabric is preserved, and you can just slide the post in the seam. Unfortunately this is not always possible because of seam placement and where you need the limb to go. You can see the gap I left in the image above.  Once you’ve made the entry point, put the post into the body.  Take the washer and slide it all the way down onto the post from inside the body.  Take the lock washer and begin to slide it on, flat side down towards the other washer. Be careful about how far you slide it down. If you push it all the way to the last notch, the arm might not turn; it’ll be too stiff. If you don’t push it down far enough the arm will be too loose. I usually stop one notch away from the bottom. If you mess up, it IS possible to get the lock washer off. In the past I’ve used pliers to yank it off.  Finish your plush as normal. Now they can wave!
If you'd like to see more tutorials or have a request for one in particular, let me know!
0 Comments
Leave a Reply. |
Archives
December 2022
Categories
All
|
 RSS Feed