|
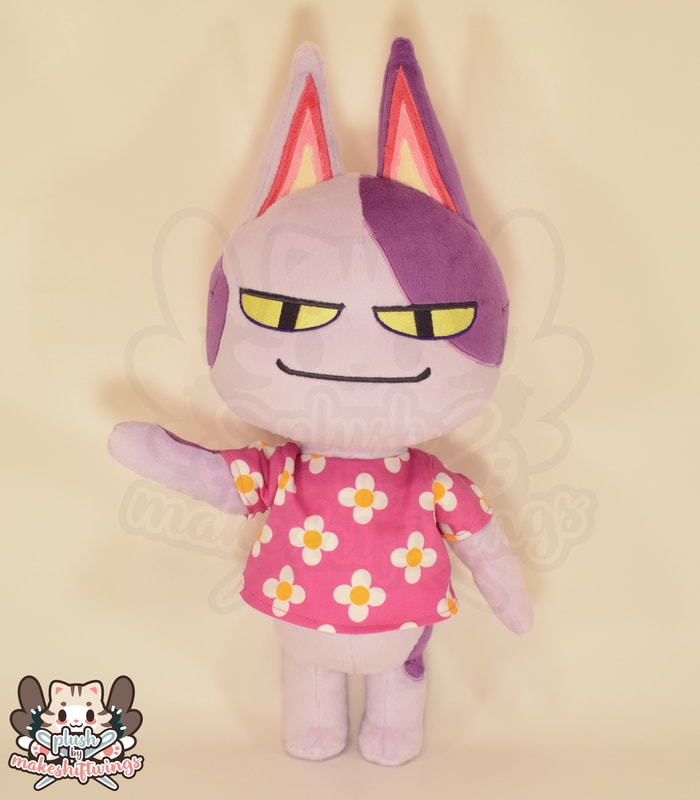
Bob is my all time favorite villager! He was in my original GameCube town 20 years ago. Every day I would log on and hope that he hadn't moved away - I did everything in my power to get him to stay! When I got the fabric printed for Wolfgang's shirt from Spoonflower last year I also added Bob's flower print in hopes that I'd get to make him one day. So I jumped at the opportunity when the request came in! Bob's colors were a CHALLENGE. He is very saturated in New Horizons, much more so than his past iterations. Shannon does not make warm purple minky. In fact, it seemed no one did. As a last resort, I ordered a swatch book from Hopen Textiles on AliExpress. That swatch book got lost in the mail and made it to me eventually, but even they only had a one lighter warm purple/pink which I ended up using for his main body color. For his darker color, I thought about dyeing it, which I really wasn't looking forward to experimenting to try and get the right shades. And then one day at Joann's, I went to the minky section... And found a darker warm purple minky - but it was dimple dot! I had remembered Dollphinwing's tutorial on ironing out the dots, so I bought it and went with that. So his colors weren't spot on to his very saturated New Horizons reference, but somewhere in between his cooler purple scheme and new scheme. It was the best I could do! After a LOT of ironing I got enough of it smooth to make the plush. For those wondering - yes, you can iron minky, but you can't apply excessive heat otherwise it will melt. But to get rid of the dots, you do need to apply a decent amount of heat. But I kept the iron moving to try and keep the fibers from melting. With that done, on to his applique! I took some photos in ACNH for reference. Of course, I had to put Bob in something skimpy to be able to see his spots. He seemed to enjoy it! I made a minor design change to his eyes. He is somewhat wall-eyed in the game, which doesn't translate to IRL well (imo). So I moved his eyes inward and angled them a bit to help with this. Despite having to do embroidery over an appliqued seam, his eyes came out nearly perfect on the first test. The very outer corners of his eyes don't align with the outline, but that was the only fix necessary. I also did a tutorial on how to do this over on my YouTube. All the applique done! I really like how his ears came out. Sewing these AC cat plush together are pretty straightforward by now since this is my 3rd one. But then... I made his head. For some reason, the back of his head was too small. Even though I had used this same pattern two times before! It was significantly too short too, by like 2 inches. I could not fathom how this happened, and I still don't. I didn't remember altering my pattern, and I didn't remember having such a discrepancy before. And it was clearly not how it was supposed to come out. My guess is that some combination of using Hopen & Joanns minky instead of Shannon brand and the applique caused the stretch to just be totally off from my previous plush. So I had to redo the bottom couple pieces of the back of his head. Much, much better! His inside-out face was cracking me up when I was attaching his ears. All sewn together with his arms jointed! His shirt came together nice and easily since I already had a pattern for that as well. I'm glad it went without a hitch because I only had enough for 1 lined t-shirt with this fabric! And with that, he was all done! I couldn't resist getting a shot of him with the BaB Nook and Isabelle! They are sized well together! You can watch a timelapse of sewing him below:
1 Comment
|
Archives
December 2022
Categories
All
|


 RSS Feed