 I love Kaolo's design and their owner made some super awesome plush references for me which made my life very easy! Kaolo involved editing my anthro pattern which I'm really happy with how it came out!  Oh what a gorgeous reference. I am such a sucker for refs like these! Kaolo has a lanky appearance and I felt like my standard anthro pattern was too "hippy" for them, so I decided to make some adjustments.
Patterning here was straightforward (at first) as I used a previous pattern.
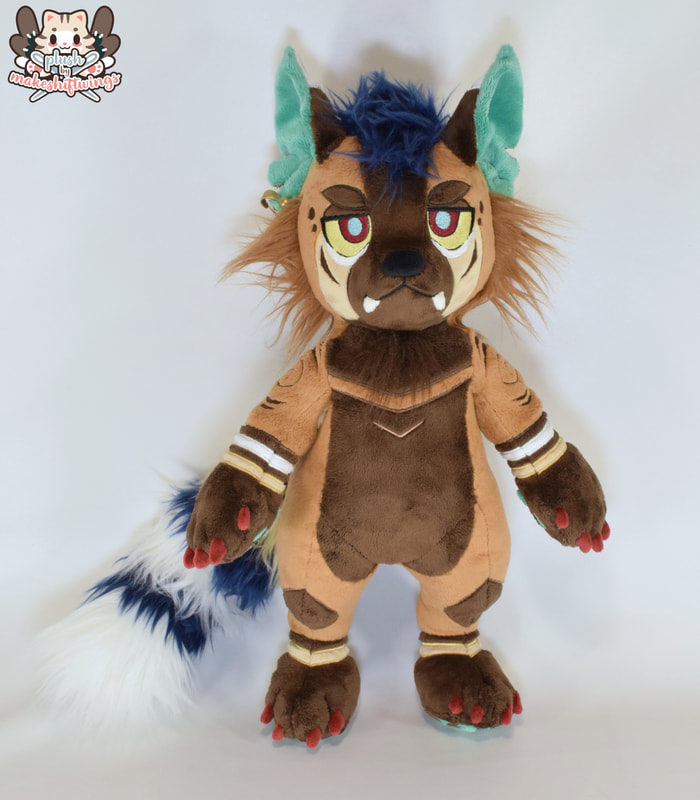
Kaolo's owner requested that the ear be attached on a curve instead of on a straight line. I do the straight line to sew it directly into a seam, which is more secure, but doesn't create as nice of a shape. This shape is too complex to machine sew, so the ears would need to be hand sewn on.
The rest of the markings were sketched on and then Kaolo was ready to take apart for the pattern!  Starting embroidery with an eye test!  Kaolo got puffy minky paw pads. I love the color combo!  All the embroidery!  Kaolo's fluffy tail was a big reason I selected the project. I love how it looks!  The body mostly sewn together! The claws are first hand basted into the small darts in the hands and toes. I like to put on a good show or movie when doing this since it's a bit tedious! Then I go over them again with my machine, and finish off the limb all together.  This was Kaolo's first head (of eventually 3). My first issue was that the fangs were too big. The frown was also not pronounced enough, and it looked too much like a smile.  I made the fangs smaller and the frown more pronounced. But my client preferred the fangs to be closer to the sides of the mouth instead of the front.  The problem with this was that there is a seam that crosses right in the area where the fang was preferred. I attach fangs essentially through applique, and that meant that I couldn't put the fang in that position. I was concerned about lengthening the mouth on the sides of the face just in case it ended up looking like a smile again.  But I wouldn't be able to rest well knowing my client was unhappy with something, so Iedited my pattern to remove the seams around that area. Luckily it forms a straight line in that general area, so I could remove them and just form the rest of the shape with darts. I really like how it looks, and it will be much easier to sew mouths like this in the future since I dont have to join up the mouth embroidery across 3 pattern pieces, and I have more flexibility with placing fangs! Time to finish Kaolo up!  Kaolo FLOP!  Stuffing Kaolo!   They have magnets in their hands and armature in their arms...  And tail!
Since it was a new plush pattern I used the paper towel method of patterning clothes for their pants.  Their pants have holes around the knees. I used bias tape to finish the edges and to put the cuff around the ankles.
I also used the paper towel method to pattern the tank top, which has a little hole in the back for the back fur to poke out. With that, they were done!
0 Comments
Leave a Reply. |
Archives
December 2022
Categories
All
|


 RSS Feed