|
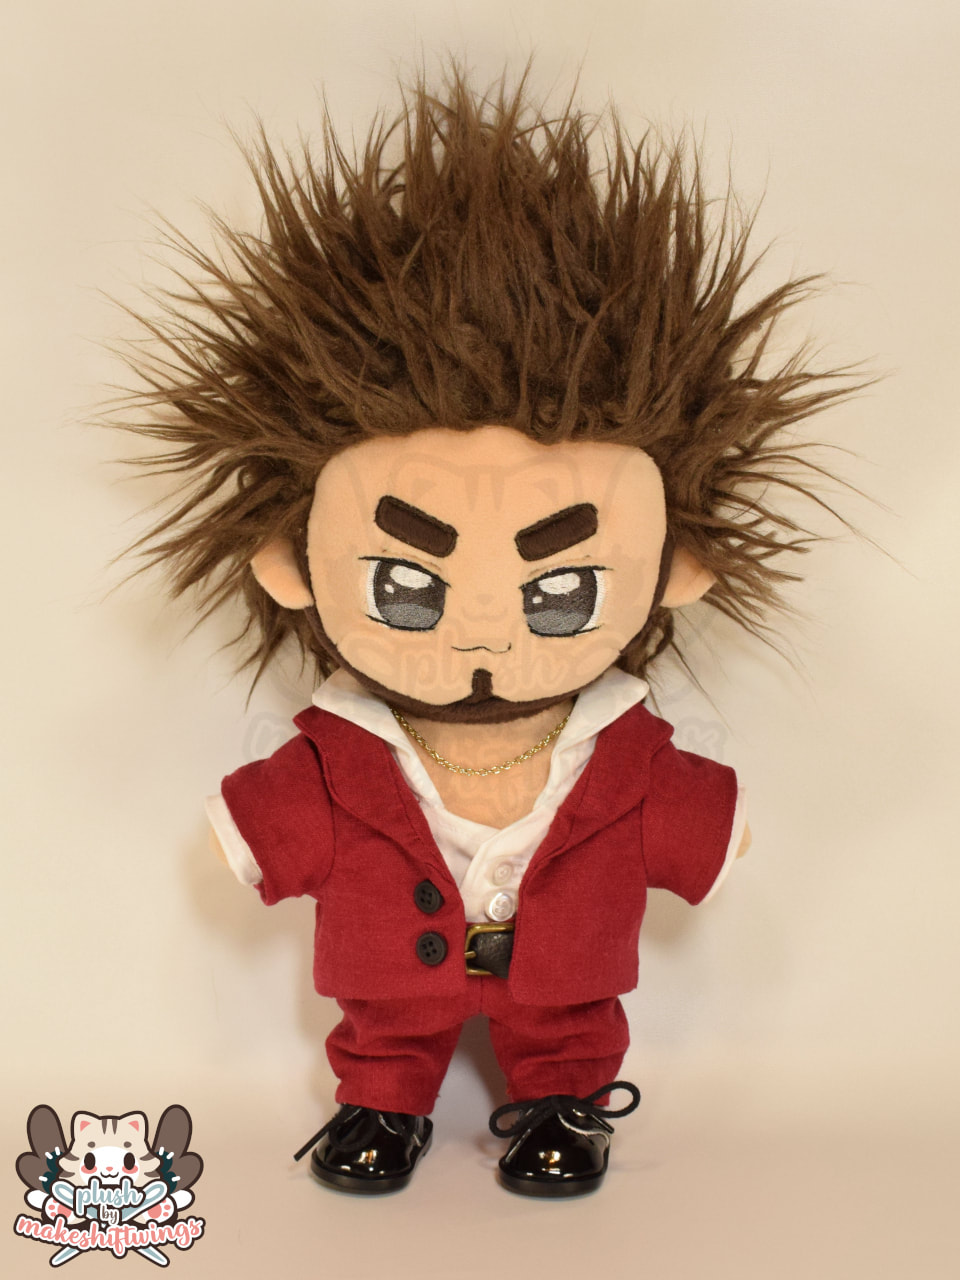
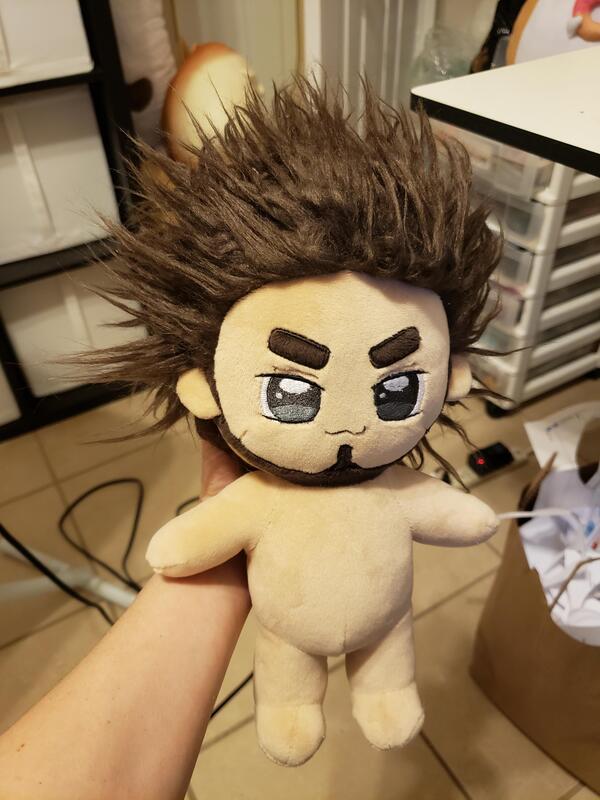
I watched my favorite Twitch streamer play through Yakuza: Like A Dragon last year. I fell in love with Kasuga and the battle system really intrigued me since it reminded me of Paper Mario, which is one of my favorite games of all time. I decided to play through it myself when it came out on PS5 since I thought it'd be a good game for my husband and I to play together (lots of story+side quests for me, lots of mini games and collectables for him). I had an absolute blast playing it even though I had seen it played through once already, and it's definitely one of my favorite games I've played in a long time! It solidifed my love for this character even more. Since there's no plushie in existence of Ichiban, I had to make one myself! I was very inspired by K-Pop/EXO style dolls that I've been seeing recently. They are just so adorable! So I wanted to try that style. I also found this curly mongolian faux fur that was unbelievably perfect for his hair. I mean, just look at it! I didn't want to use normal minky since it's a long pile and it's a human plush. I couldn't decide for the life of me what kind of fabric these K-Pop style dolls were made out of. I mean, they just look so soft! I asked around on plush maker groups and got many answers. But I ended up torn between 1.5mm minky and mochi minky. I didn't really want to work with mochi minky because it seemed like a nightmare, so I ordered some 1.5mm from Hopen and hoped the color was right. I also bought some pink and black mochi to hopefully make paw pads with one day, and some mochi stuffing as well. ... And, the color wasn't right! It was way too peachy in color, not appropriate for Kasuga's skin. I didn't want to wait another month for more fabric from Hopen, and just hope whatever I bought was the right color. So I ordered some secondhand mochi on Etsy in a color I thought might be better. ... And it was nearly the same color as the 1.5mm. ARGH! Well, this meant we were dyeing the fabric. I bought some RIT Dyemore in sandstone and gave it a try. I dyed swatches of both the 1.5mm minky and the mochi. ... They turned out GREEN! WTF!!! I don't really understand color mixing but I figured that this dye had some really heavy green undertones that mixed poorly with the fabric and created this green result. Sadly, this resulted in another trip to JoAnn's and more dye purchasing. I bought RIT Dyemore in brown and iDye Poly in brown as well. The RIT Dyemore was WAY TOO BROWN. Even leaving the fabric in the dye for mere seconds turned it way too dark. The one on the right was a pretty color but certainly not what I was looking for. So I went to the iDye Poly, praying it would work out. Otherwise I'd have to order more fabric. I used 1/2 packet of brown and a sprinkle of red, which I had on hand from dyeing the feathers for Raziv a couple years ago. We were on the right track!!! This was too dark, but I could just take it out sooner. Much, much sooner. I stirred the fabric in the dye bath for a total of 10 seconds, pulled it out and let it drain for a few seconds, then immediately rinsed it in cold water. Ran it through the wash and... BEAUTIFUL! This was the 1.5mm minky. This is the original color next to the dyed mochi on the right. I was thrilled with how well the mochi took the dye. The dyed fabrics came out -slightly- different, and I liked the mochi a bit better. I also preferred the shorter 1mm pile of the mochi over the 1.5mm, even though you can barely tell a difference. And... tbh, I kind of wanted to work with the mochi after all this. I thought it looked closer to the photo of the K-Pop doll I posted above as well. So... mochi it was! I was SO HAPPY I purchased extra mochi from Hopen since I needed to pattern it with mochi since the fabric is so different from normal minky. One of the pinks I bought was way too pink, so I used that to pattern the plush. Since the plush would only be around 8 inches tall it would have a lot of small parts. My goal was for it to be easy to sew together and entirely machine sewn. As usual, the first attempt was awful. Second attempt was better but I realized.. the front of it actually looked better as the back! So I would end up flipping it for the next iteration. For the next one, I tried out the embroidery on the face. The spacing of the eyes was just awful, and the eyelids basically disappeared altogether into the thickness of the mochi minky. It was also just too small! Kasuga has a giant tattoo on his back. The proportions of the doll wouldn't allow for the entire thing, so I had to cut off the tail. It's also extremely detailed so some of it needed to be simplified. My first try at this, I did my normal dense stitches, and they ended up just eating themselves since there's a lot of overlap in a small area. The details were also misaligned and the thread kept breaking. I needed to decrease the density and simplify the design further, resorting to markers to add the face details. I redid the face size and spacing - much better! The body was too chubby and needed to be slimmed down. The head also needed to be slimmed a little bit. But we were ready to go onto the real thing! Because of how I designed the pattern, the plush gets sewn together easily and quickly! I changed his eyes to grey instead of brown; they look like both colors in the game, but are technically grey, so I went with that. There were still some spacing issues above the eyes where the white poked through beyond the outline, but since this is a personal project and I have limited dyed minky I decided not to redo it. The tattoo came out much better with less dense stitches. Since mochi has a shorter pile, it didnt stick out through the stitches as much as I feared. I used a pointed tip Sharpie to draw on the black face details. I also used a dark grey Sharpie to add some shading to the fins. I bought these adorable little shoes on AliExpress, since I have no interest in making my own shoes any time soon and they were too cute to pass up! Since I didn't have any mass-produced plush clothes to take apart for the pattern that would fit him, I patterned Kasuga's outfit with the paper towel patterning method. Pants, belt, and necklace! I also decided to do the paper towel patterning method for his button-up, too, mainly for the purpose of making a tutorial (which you can watch below). I probably could have shrunk one of my existing patterns for shirts, though. For his jacket I enlarged the button-up pattern, shrunk the sleeves so the button-up would show up beneath it at the edges, and changed the collar. I also partially lined this jacket since it would be hanging open. After sewing on some buttons and finishing up his belt, he was all done! You can watch a timelapse of sewing him below. I love this baby boy so much, and I'm thrilled to have him around! This is only the 4th plush that I've made for myself in over 10 years of plush making! (And the other 3 are Shifty LOL)
2 Comments
Rene
2/15/2022 10:34:34 pm
Hi! I've been checking out your plush tutorials and they're super helpful. I know you mostly make animal/critter plushies, but if you ever decide to make more K-pop style dolls the fabric they use for the skin is called 1mm 水晶超柔 (I'm not sure what it's called in English, but you can find the fabric on Taobao).
Reply
Leave a Reply. |
Archives
December 2022
Categories
All
|


 RSS Feed