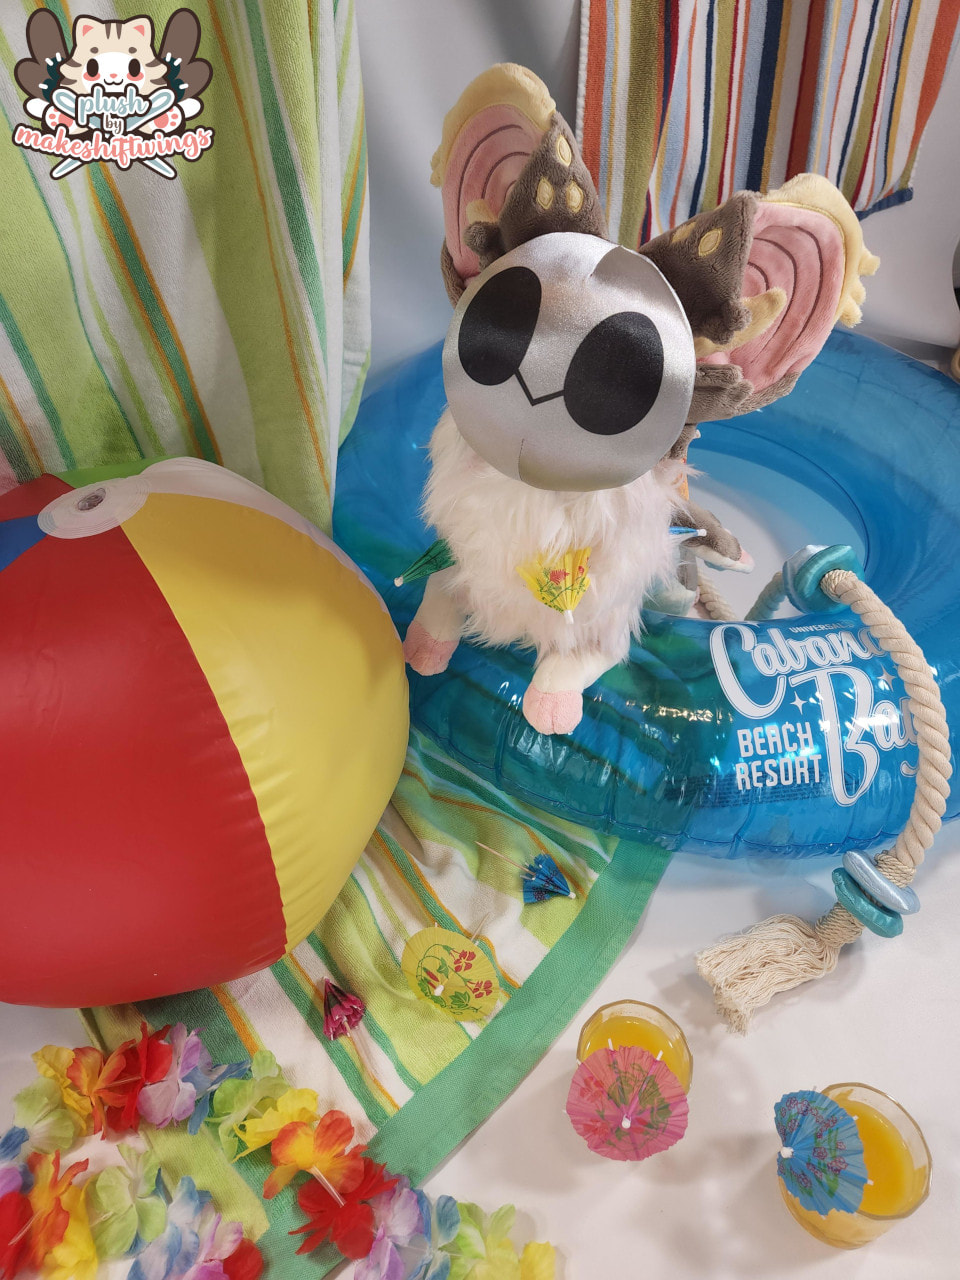
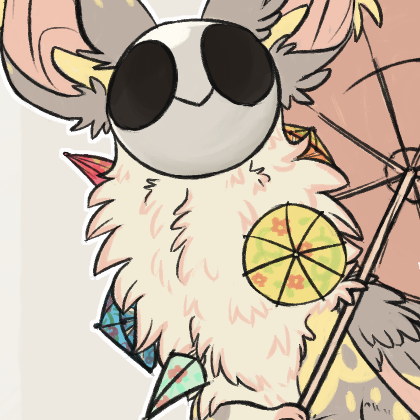
What a fun character and plush!! Phoebe has such an adorable design - I love her color palette and umbrellas! This was also another great opportunity to use my floppy quad pattern with a variety of materials. There was no question about taking on this commission!
Phoebe is a bellringer which is a closed species owned by MangopoptartART and MokoBuns. They all hoard a type of object found in the space that they live! In Phoebe's case, she collects cocktail umbrellas from the resort that she lives in. My client's request was for the plush to be made to a scale where cocktail umbrellas could be stuck in the neck fur. So, it would either be my medium or large size floppy quad pattern, but I needed to see how cocktail umbrellas compared in size first!

Phoebe was supposed to be the last plush in my queue, but due to fabric supply issues holding up another commission she ended up being second to last. I ordered some cocktail umbrellas early on to determine what size she would be. Luckily, I had a prototype quad body lying around to test the size on. This was the medium size. It looked perfect!
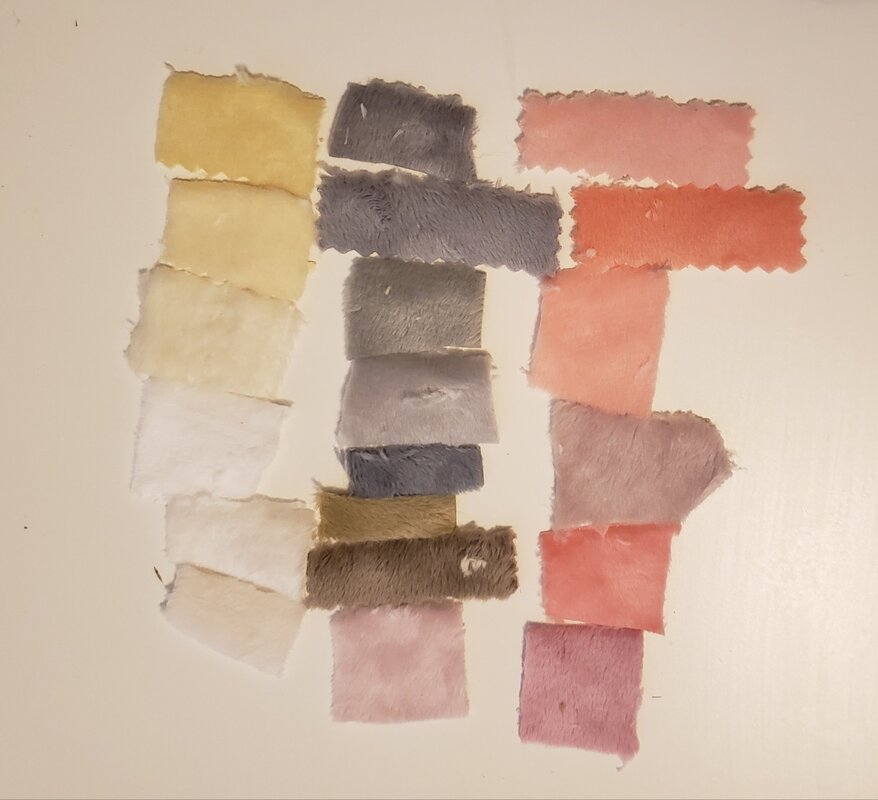
I sent swatches to my client and boy am I glad I did, because this was another instance where I would have chosen totally different colors than they did. Phoebe appeared more grey on all of my screens, but my client chose simply taupe (the bottom most brown color in the middle column). Vanilla custard was also chosen, which is a random Shannon minky color that one day appeared on their website. It's between ivory and vanilla in color. Every once and a while they will list random new colors out of the blue that are very similar to existing colors. I believe they are either one-off runs or dye lots gone too poorly to call it an existing color. But how much Shannon colors vary over different runs make me 2nd guess that theory ?
The other colors chosen were shell and banana. All the colors together make me think of a neopolitan ice cream banana split! 
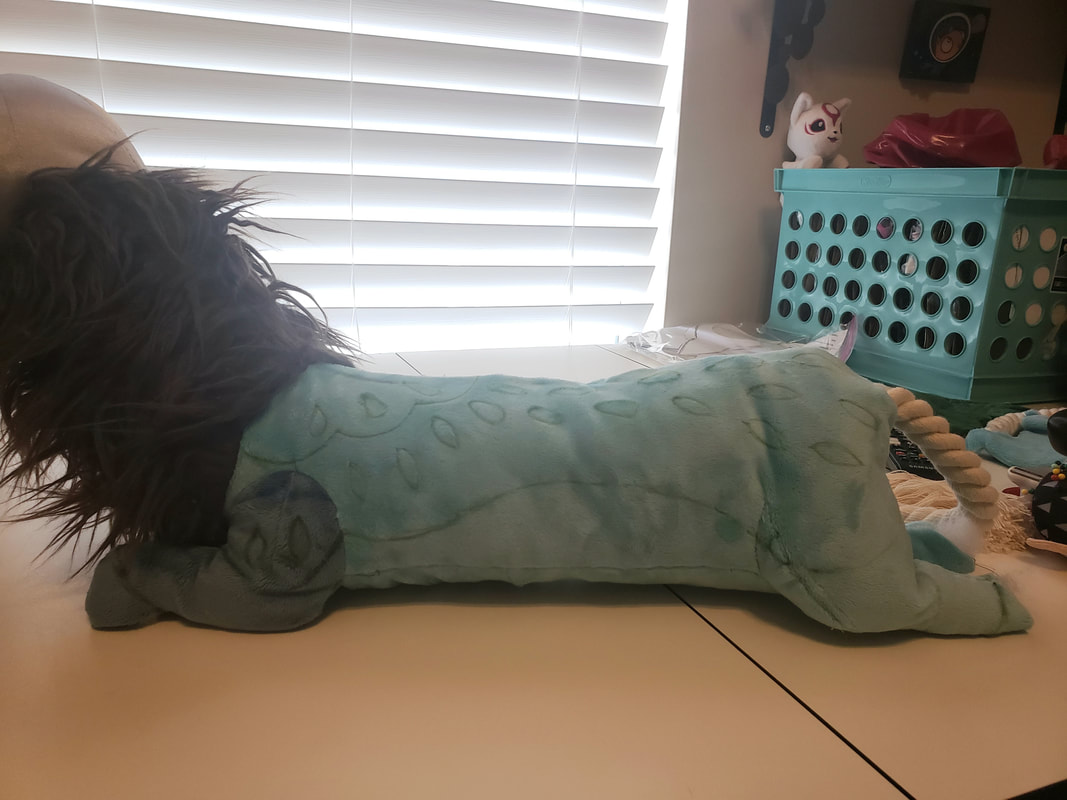
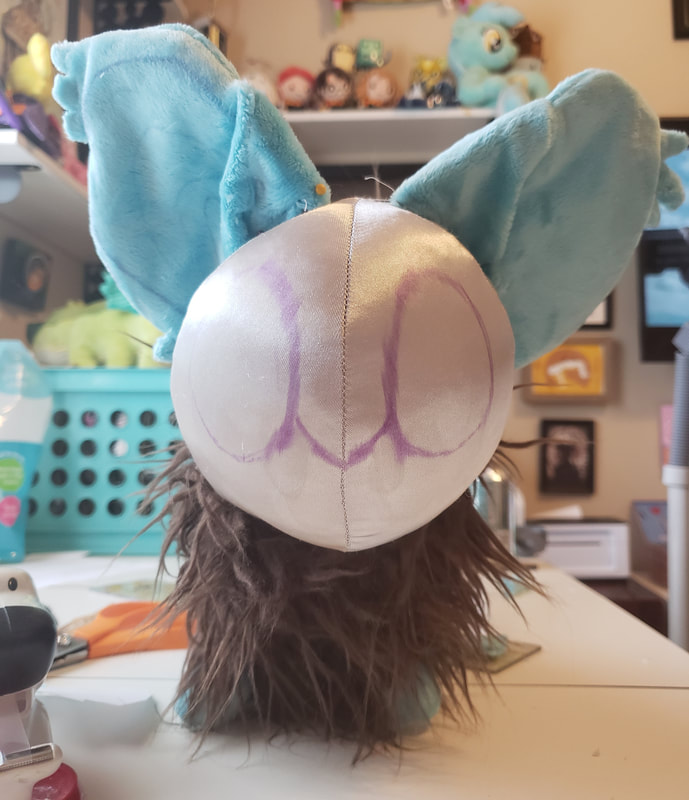
I used my sugar cookie ferret version of my quad pattern, but it needed to be made longer for Phoebe. Somehow I managed to flub how long the gusset needed to be; it was longer than the body. That's an easier fix than adding extra length, so I just folded it and made a seam to shorten it. You can see the line in the belly above. This won't be in the final plush, just in the prototype.
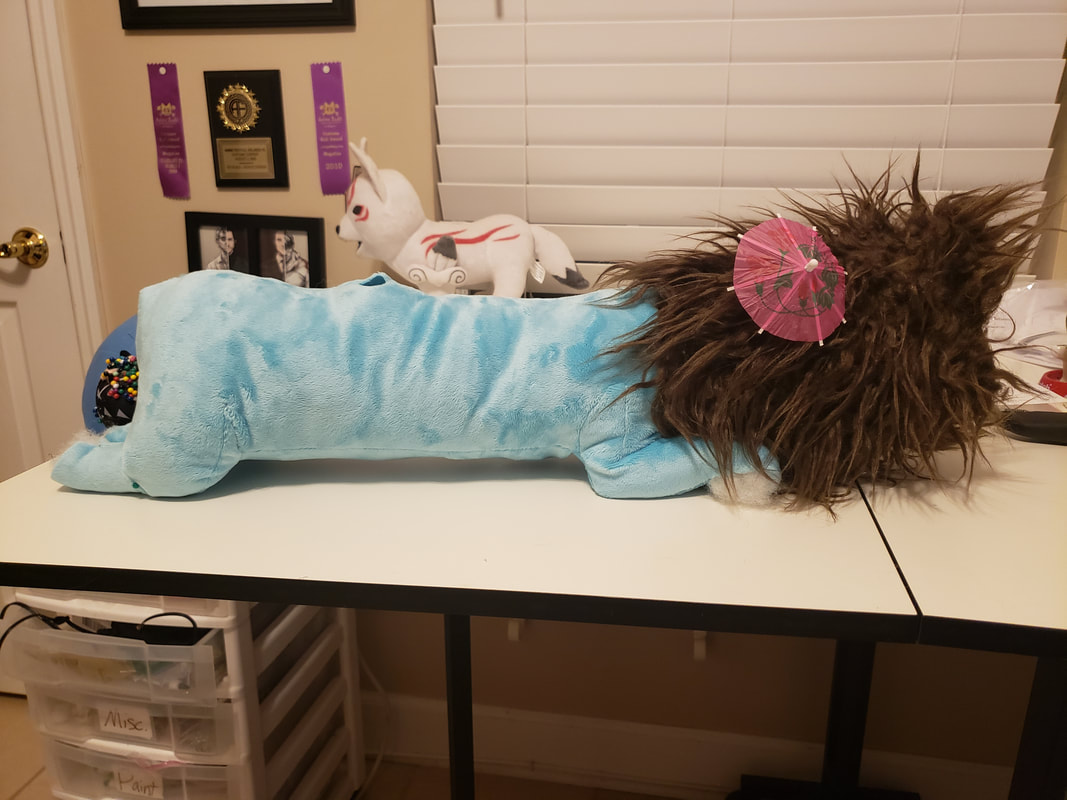
The neck was elongated for the fur neck ruff. I always use the fur I used for Kasuga Ichiban's hair for prototyping, since I'm 99% sure I'll never use it again. This fur is longer than most furs I end up using, which is why the neck looks way out of proportion here. Also stuck in a cocktail umbrella to double check the size!
My client was open to alternative materials for the head, since it's supposed to be metal. She even mentioned 3D printing - which unfortunately not in my wheelhouse. I didn't want to use minky because of the fur texture. I wanted to explore non-plush fabrics with mochi minky as my fallback plan.
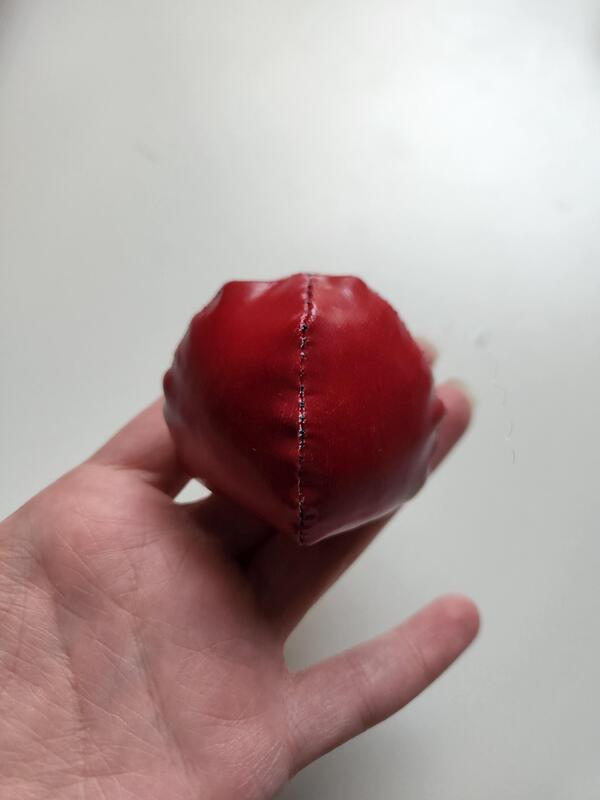
I dug through my giant stash of fabric and started with some PVC vinyl fabric which I thought might mimic a metal look well. I started with a tiny ball made from a 4 part sphere pattern. I wasn't sure if it would work at all so I made a very small size. It was misshapen and lumpy, but I thought it might be better on a normal scale because it's so hard to sew at this scale, so I tried it out. 
Well the full scale was not any better - even though it was more misshapen, which could be fixed, the issue is in the stuffing. This is a non-stretch, thick fabric so stuffing it would result in those dents along the seams. Unless I stuffed it REALLY HARD, which I didn't want to do, it wouldn't be fixable.

So, I moved onto a plain non-stretch satin. The tiny test was promising so I moved onto a full scale. I needed to lengthen the bottom since it wasn't perfectly spherical.

Well I didn't do a good job and the full scale came out very football-like ?? but it behaved much better with stuffing, so I moved on with it. However, it was a nightmare to work with, very thin and shifty.
After correcting the head shape I drew on the face. This fabric was "absorbing" the marker over time, hence how smudged the face looks.
I also began patterning the ears. I wanted to do a built-in fold on the inner part of the ear and add a separate piece to work as the fold for the outer side of the ear, since the outer side of the ear was more curved. The outer ear also had some fur tufts on both sides which I could not do with a built-in fold. (By built-in, I mean that the ear is a single pattern piece and you fold it onto itself, like in my tutorial here).
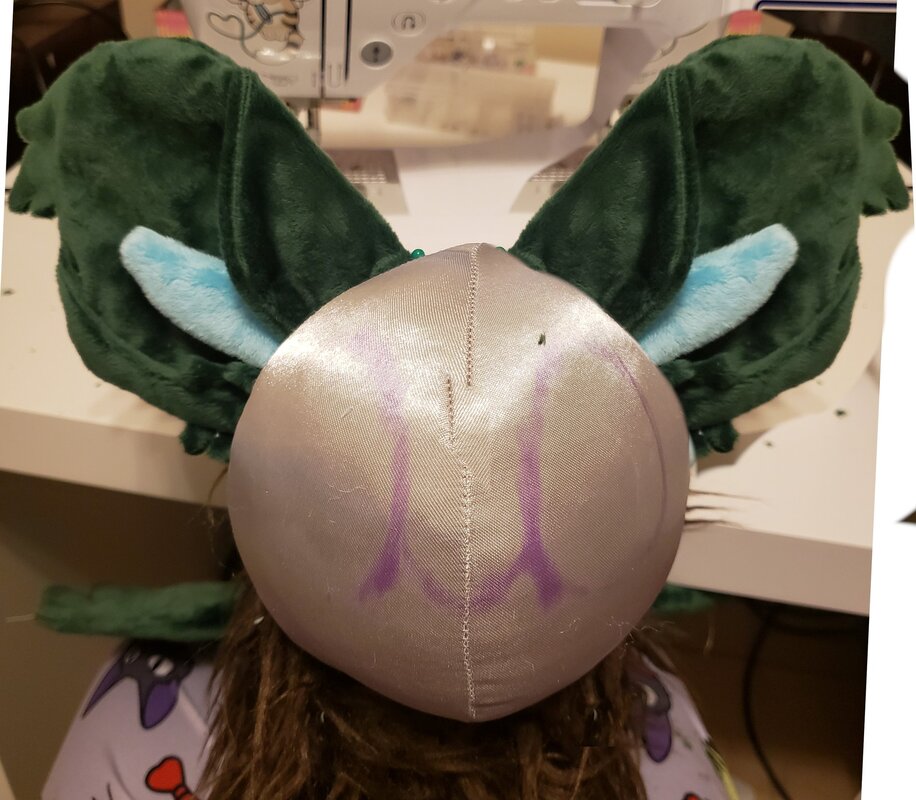
I made another test ear with the additional fold on the side and the tragus (blue part in the middle, like a bat). Although, I managed to forget the ear fluff on the built-in fold ? Since the ears are symmetrical like ears tend to be, I just mirrored the image in photoshop to see how it looked. Looking good!
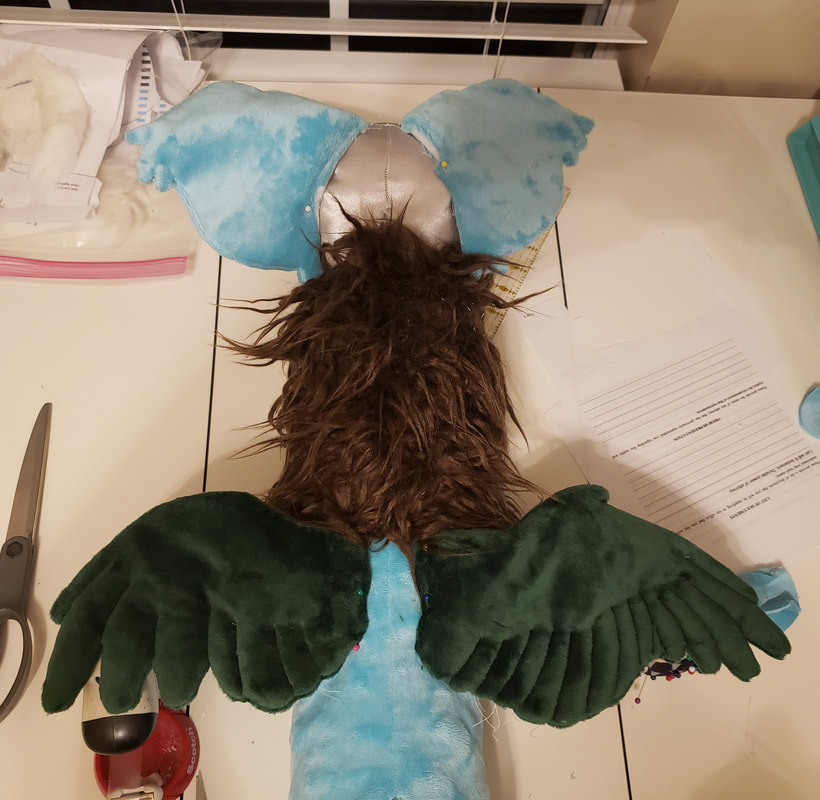
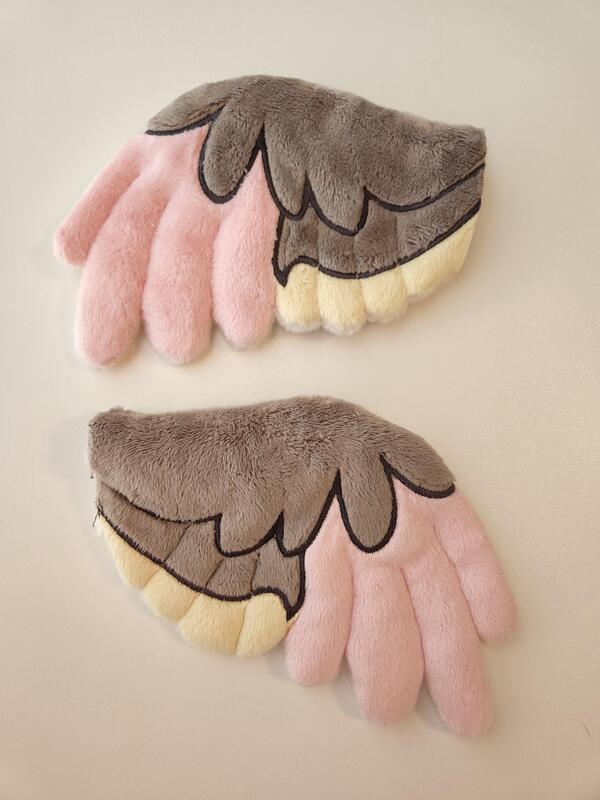
Phoebe had a couple different wing looks in her ref, so I tried them both. The one on the right was more detailed/complex, with the one on the left much more simplified. We decided to go for the one on the left since it fits the look of this plush better overall. They also needed to be smaller.
The 3D look was made by lining each wing with a layer of quilt batting. The individual feathers are defined by top stitching. While they are just pinned on in this photo, they would be sewn into a dart added to the body pattern in the actual plush.

I was concerned about doing any embroidery on the fabric I was using for the head since it was so thin. I figured it would just rip apart or ripple. So, I decided to do sublimation. I started by using a scrap ditto printout I had to make sure it would take ok. Then I printed out some squares of black for tests. I tested different times and temperatures since the fabric can burn, and you need to get it just right to get the color to come through while protecting the fabric.
I did a test on a satin head and while the eyes needed to be closer together, I was starting to get very concerned about using this fabric. Not only did it easily shred at the seams due to how lightweight this fabric was, which could be a concern while handling this plush, it also easily scratched, which you can see on the eye in the right side.
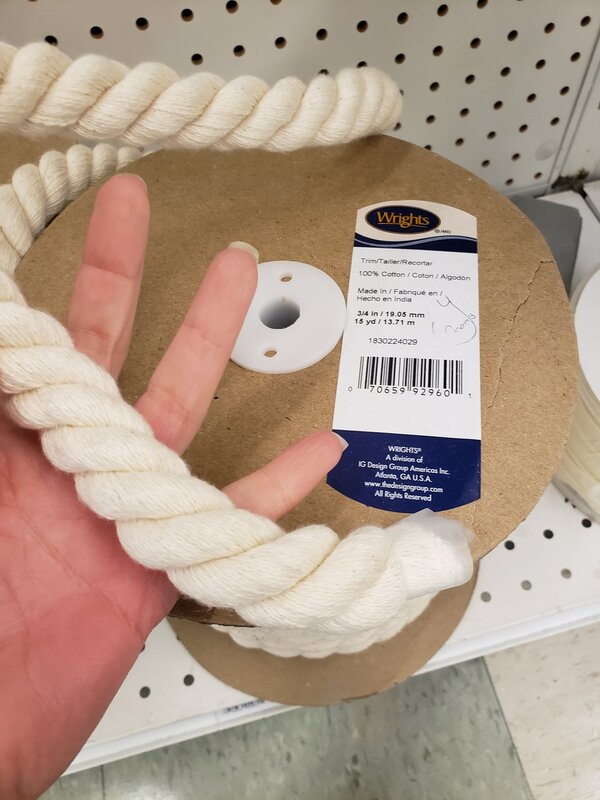
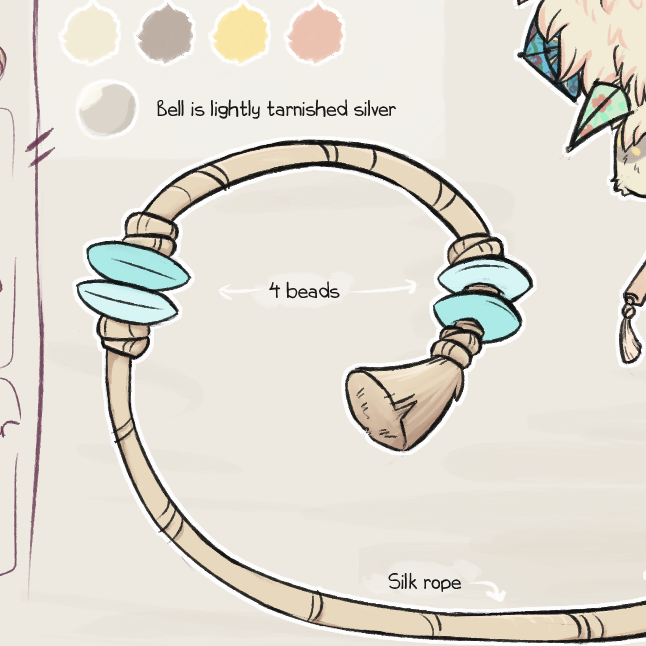
Phoebe's tail is a rope. It's supposed to be silk rope, which couldn't be found at my fabric store, but they had cotton rope instead. I really wanted to use actual rope but I was concerned about size and how it would attach to the plush. I certainly could not sew it to fabric, because my machine would not be able to go through such thick rope and hand sewing would not be strong enough. My fallback plan was braiding mochi minky, but I wanted to avoid it.
I asked my plush making friends in a Discord server I'm in for advice, and they came up with the great idea to make a "stopper" that sits inside the plush. The rope is fed through a hole and the rope is tied at the other end. The rope comes out of hole in the plush, but the hole is too small for the stopper to fit through. It was perfect!
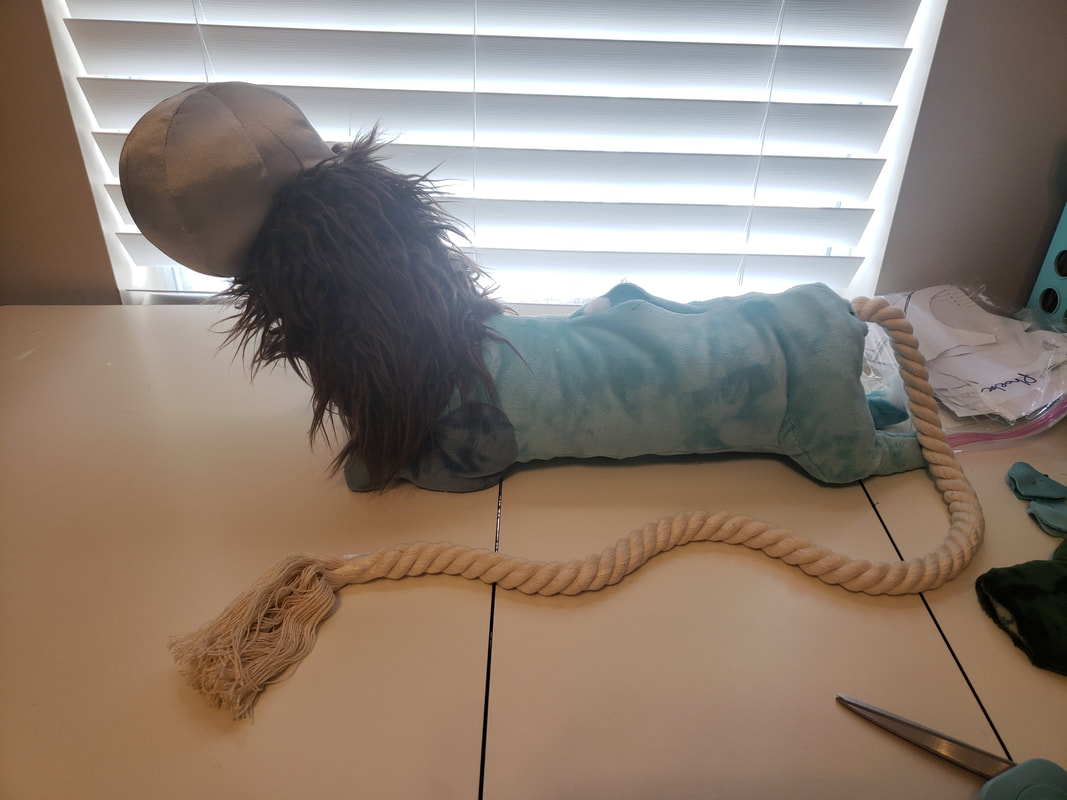
Since the rope is made from natural materials once it unravels it just comes apart - which was really good for the tassel end of the tail, but it needed to be stopped at some point. For now I just used tape to keep it intact and I'd deal with finishing it later. I also had planned on unravelling part of it to use for the details around the beads, but since it literally just -shreds- that idea wasn't going to work and I needed to go back to the store and buy thinner rope to add on.
There was one last thing I wanted to experiment with before starting the final plush: sublimating a light pink tone onto the ivory faux fur used for her neck. I was not convinced it would work since faux fur easily melts and you need to apply relatively high temperature for a period of time to transfer the dye in the process.

So I took out one of my spare ditto prints and applied it at my normal 350F for 60 seconds to see what happened. And, of course, it melted. But it applied!

I backed off and did 300F for 60 seconds, which was successful! While you can't really see it well here (you can kind of see some green and red to the left), it applies a very light tone to the very top of the fabric. Of course, designs like the ditto will never stay intact because the fur will separate once you brush it out.

Again, really hard to see but I tested some different colors and was pretty happy with the tones in person. I ended up sending this to my client since it was so hard to take photos of, and we decided to use a very light pink tone for the fur!
You can see the effect better above! The fur gets smashed down in the sublimation process but you can brush it out. It's a real shame it can't be seen well in images or video because the effect is beautiful in person!
I drew on her markings then took apart the pattern and designed the embroidery. I decided to color block the transitions for a couple reasons:

The rehooping process went really well without any hitches! I recorded footage for a tutorial that I also have in the works :)
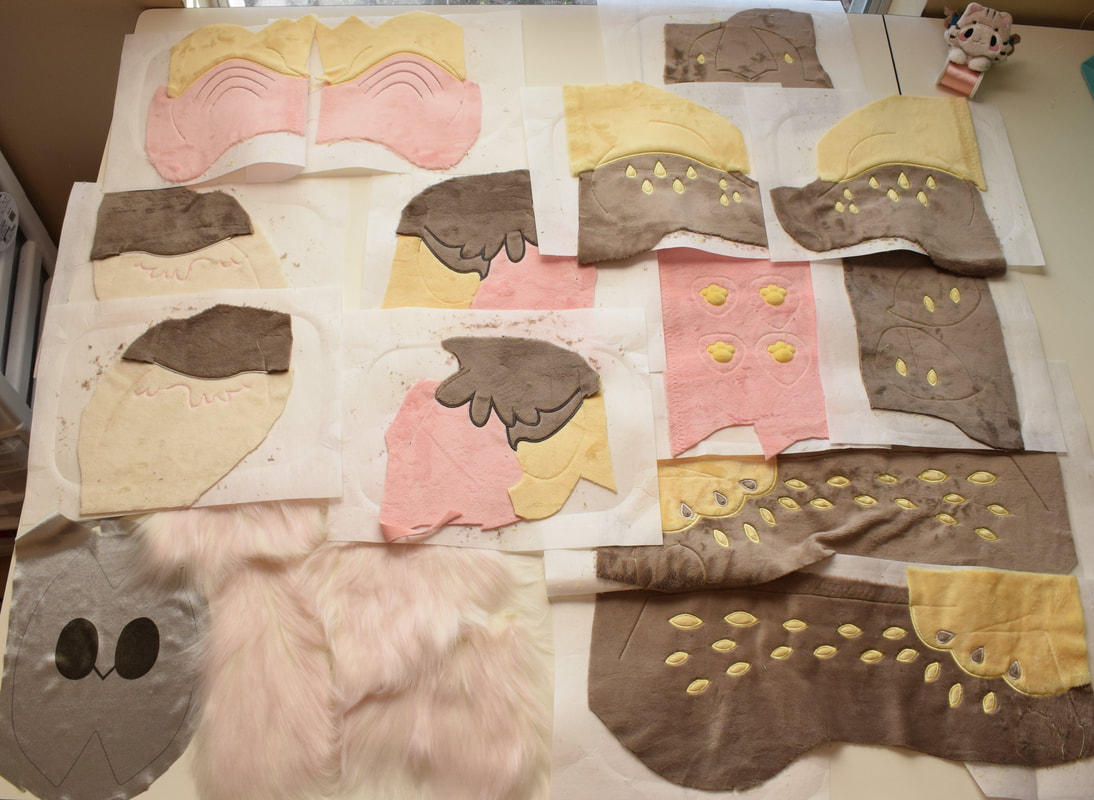
All the sublimation and embroidery!
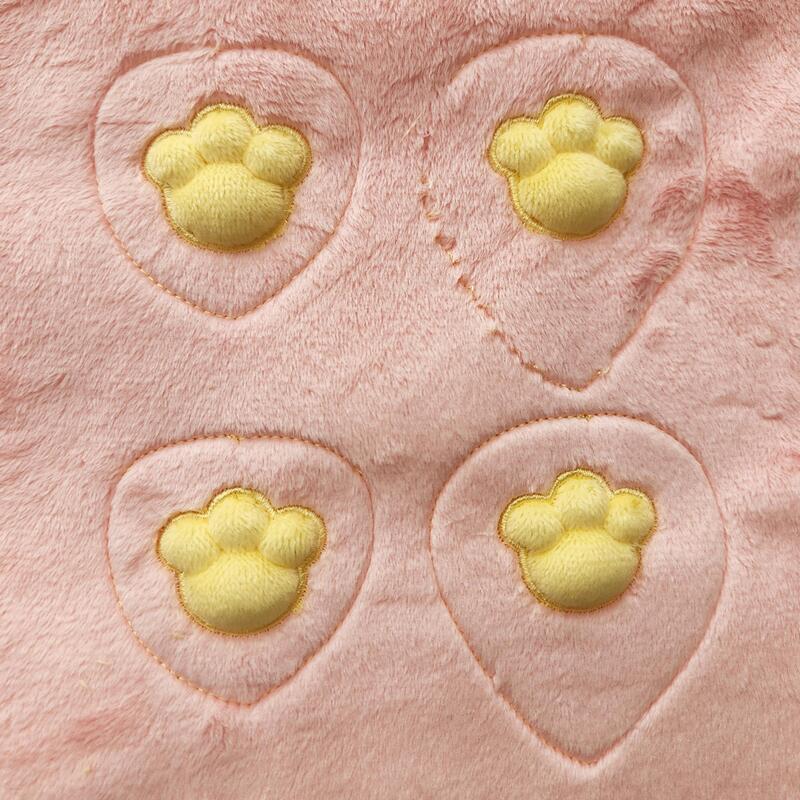
Pink lemonade mochi paw pads...
... and neopolitan ice cream wings! Her colors make me hungry ?

The sublimation for the face and fur!

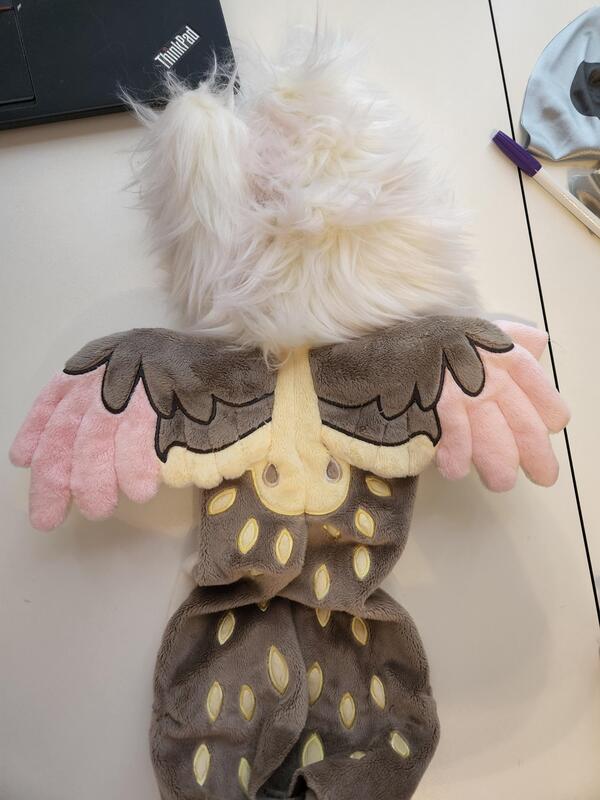
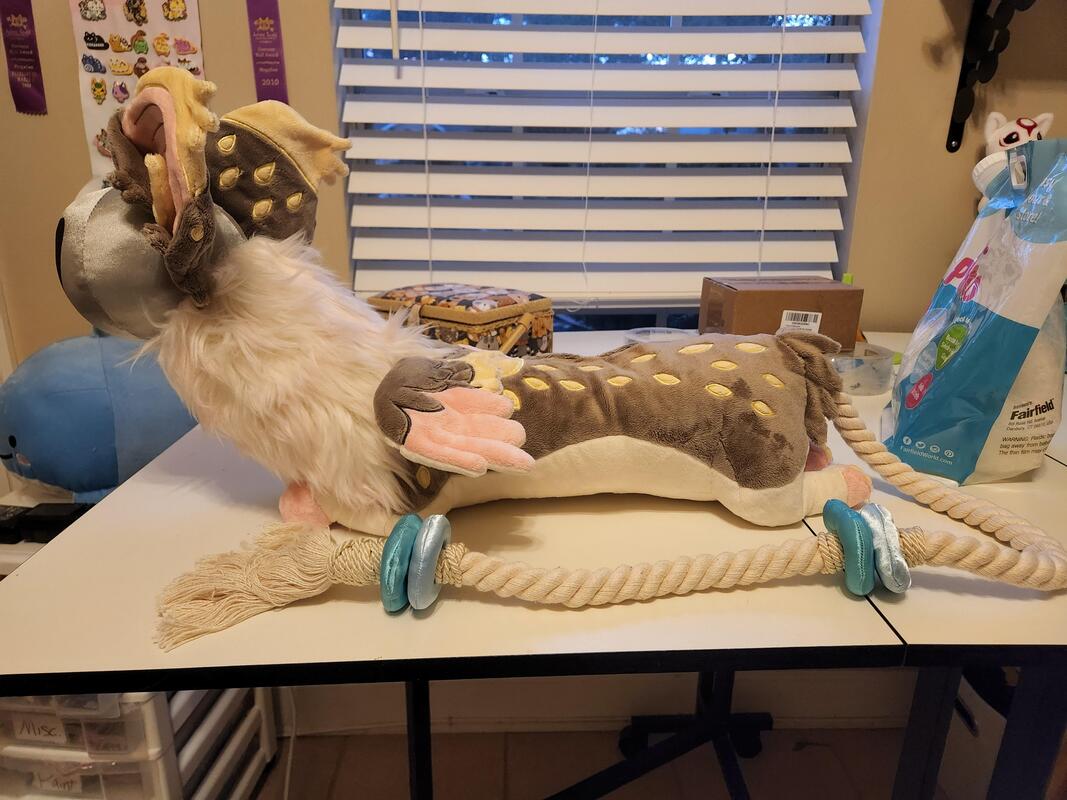
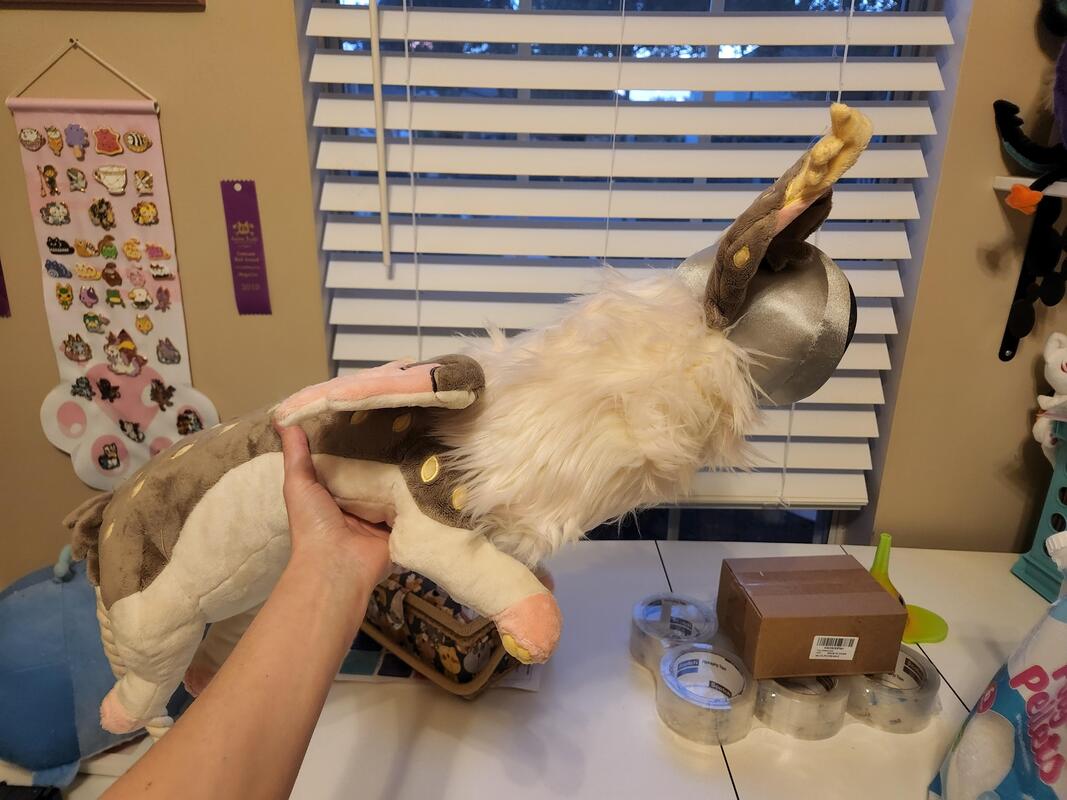
Her body came together without much issue! Just a -lot- of color blocking. I also -love- her wings.
The ears have a LOT going on - the built in fold (on the insides); the separate piece that forms the outer fold; all the applique; a separate 3D tragus; and applique spots. They are lined with a single piece of felt for stability; the rest comes from the sturdiness of the fold and extra pattern piece.
The outside fold is an extra 2D pattern piece that is attached to the front of the ear. The back of the ear is then placed on top of this with right sides together. The ear is then sewn together as normal. When you flip it right side out, the extra piece sewn in looks like a fold.

I was very pleased with the shape of her head and the sublimation! The darts also came out nice and clean too - these seams were pressed with an iron to make them crisp. It's very important to press seams on non-plush fabric for a professional look.

Time to go back to figuring out the details of the rope tail!
I ended up tying off the end of the rope with thread sealing tape, which was a good color and could be wound tightly around the rope to keep it from unraveling. On top of that I would add thinner rope. 
The beads were made from a flannel-backed satin. These weren't as thin as the original satin I was using for the head because of the backing. The patterns are just small donuts with the hole just big enough to thread them onto the rope. My favorite tutorial for how to sew donuts is this one. I've seen several tutorials but this one was the easiest to follow, imo.

Now I needed to add the little rope details but again... how to finish the edges?
I picked up some rope that was a cotton/polyester combo. I was hoping I could finish the edges with a lighter since it was partially synthetic, but it also just unraveled like the 100% cotton rope once it's cut. At the store when they cut it they wrap the end in tape and then cut through the tape. But I didn't want to only have a piece of tape covering the end. Shoe laces have a plastic cap on the end - I thought I could make my own out of clear worbla, which I had in my closet for cosplay purposes. Worbla is a flexible plastic that you can heat up with a heat gun and connect to itself. But while using my heat gun on the worbla with the tape-covered rope on it... the tape melted and formed a cover! Of course! Tape is also plastic, like worbla, so it melts to the high heat. But it's thinner and does the job of creating a cap just as well. So, tape was the answer after all! 
I tightly wrapped the areas in this thin rope.

When I was done wrapping a section, I covered the area I wanted to cut with tape and cut down the middle. I added more tape to this piece, making sure the tape stuck out a bit from the end. I heated it up with my heat gun until it started to melt and then carefully squished it down with my fingers to form the cap. (I wouldn't recommend doing this - I have "baker's hands" so I have a high tolerance for grabbing hot objects). The ends of the rope were tucked in underneath the gems of the tail and glued to the big rope for extra security.
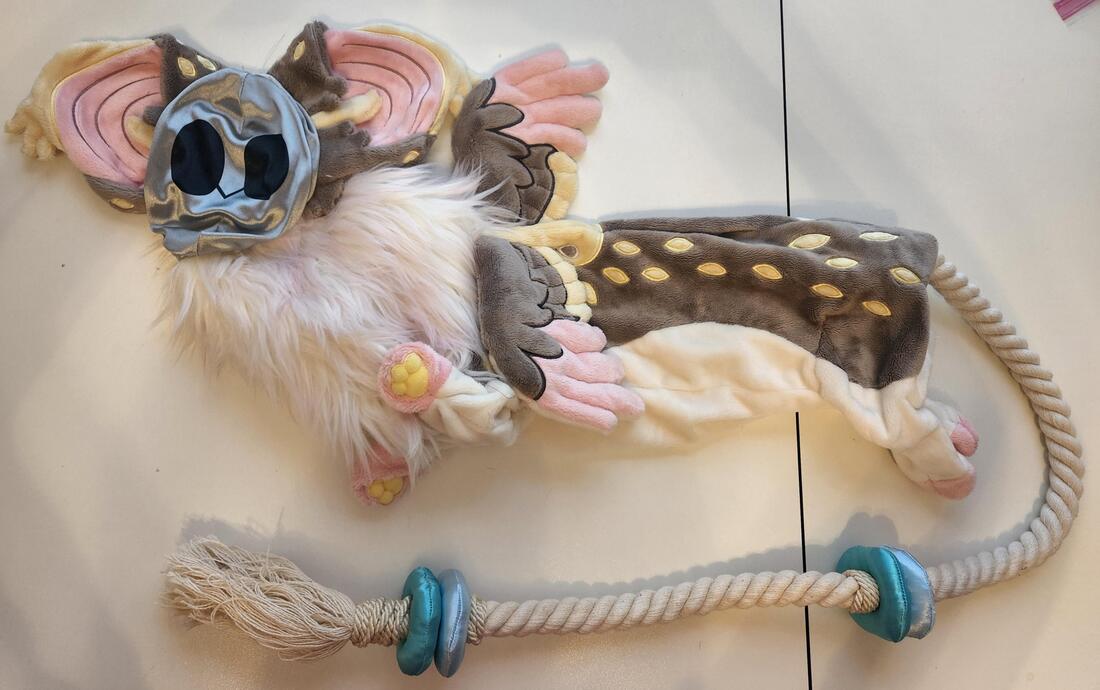
Phoebe FLOP! Man, that flat face is the scariest one I've made.
Floppy minky plushies always take strategic stuffing involving poly pellets and soft mochi stuffing. Phoebe took extra care because I needed her neck to stand up. My technique involved:

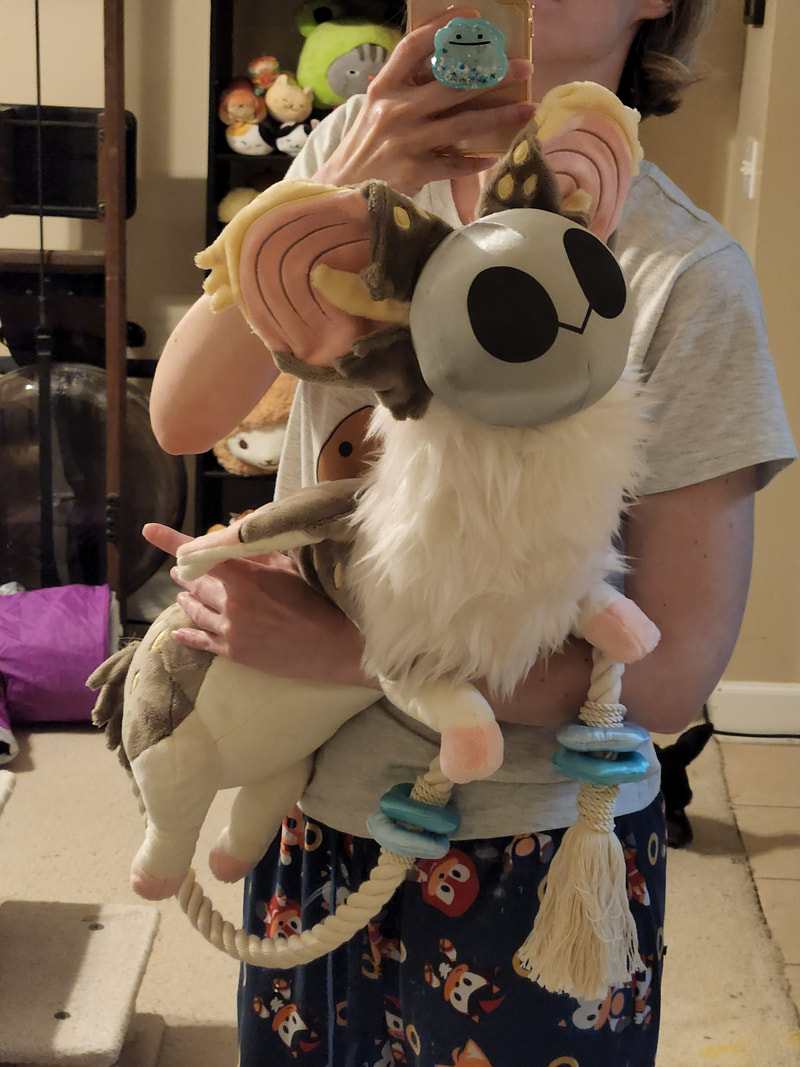
She is just TOO CUTE!

She required minor hand sewing - needle sculpting the paws, closing the stuffing hole in her back, and anchoring the ears in place. Because of how big the ears are and how soft the head fabric is, they were very floppy. We even had some back and forth on whether they were too big, but ultimately it was the angle.

And the final touch - the cocktail umbrellas! These just stick right into the faux fur. It takes some pressure, but they puncture the backing and stay in place well. I didn't want to make them permanent just in case they get damaged because, well, they are just normal paper umbrellas, and they can just be replaced.
Now she was all done! I'm beyond pleased with how she came out and I really hope I can make more bellringers in the future ^_^ Specs
0 Comments
Leave a Reply. |
Archives
December 2022
Categories
All
|


 RSS Feed