 I've admired aubryjoi's character, Taro, from afar for quite a while! So I was thrilled when they asked if I was interested in a trade! 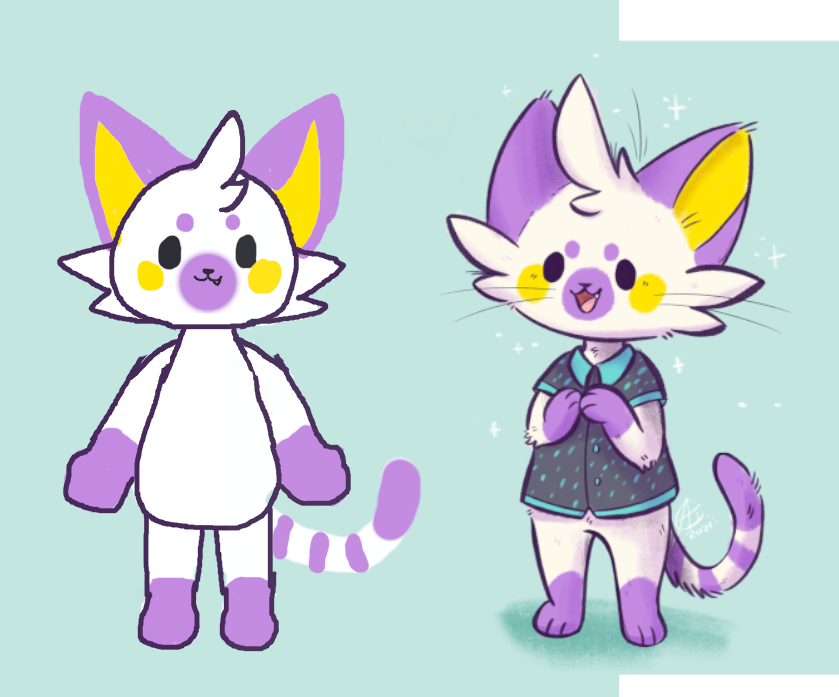 I had actually drawn the concept for this plush long before Aubry had reached out to me. I've been wanting to design a ragdoll style base to be able to offer a floppy plush for digitigrade characters to go along with my floppy style for quadruped characters. My standing anthro plushies are more display pieces and I wanted this to be something bigger for cuddling and to be able to fit into BaB tops & bottoms. Taro was the perfect guinea pig since they have a very simple and clean design that was perfectly along the lines of what I wanted to make! So when Aubry asked if I was interested in a trade someday, I was like uhm... YES!!!! and showed them this concept I had drawn a long time ago 🤣 Plus.. I absolutely LOVE Shifty in Aubry's style! 🥺
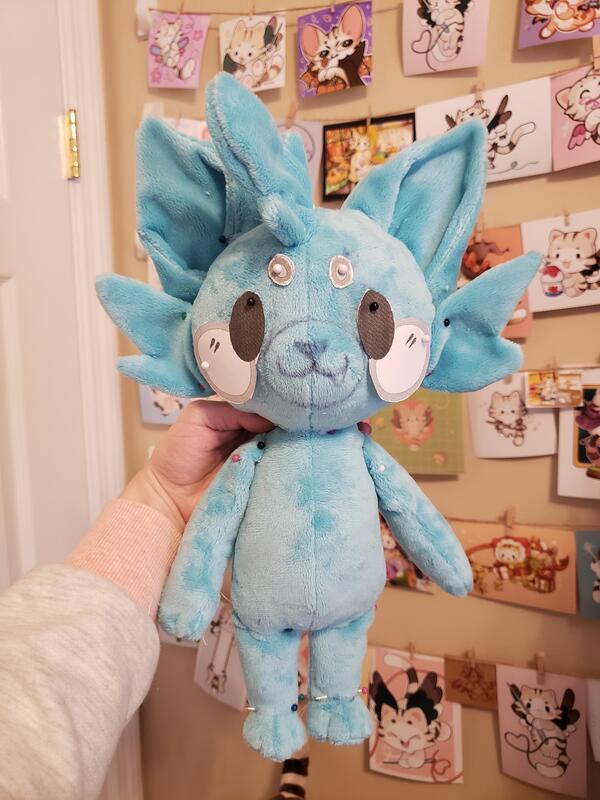
The head was... oh my, so cute 🥺 I would convert the middle seam to a dart along the top and bottom so that the mouth and nose embroidery wouldn't be cut in half.
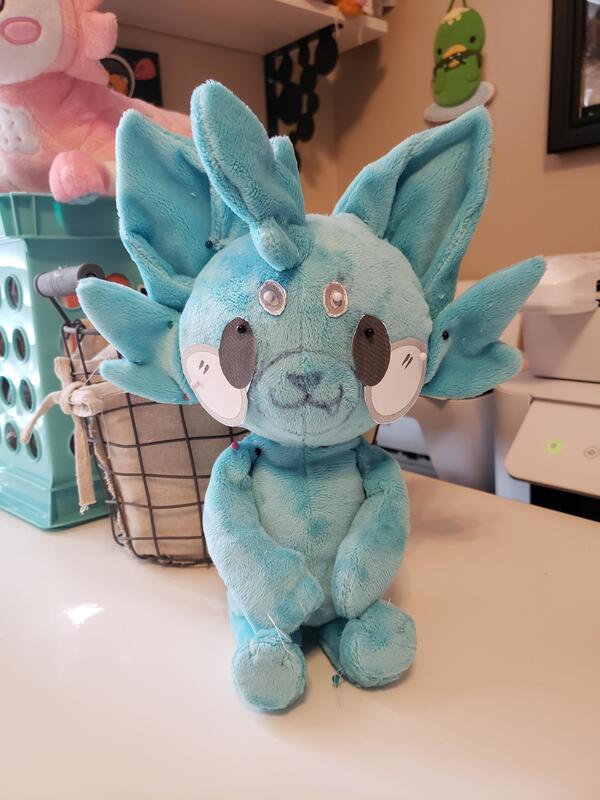
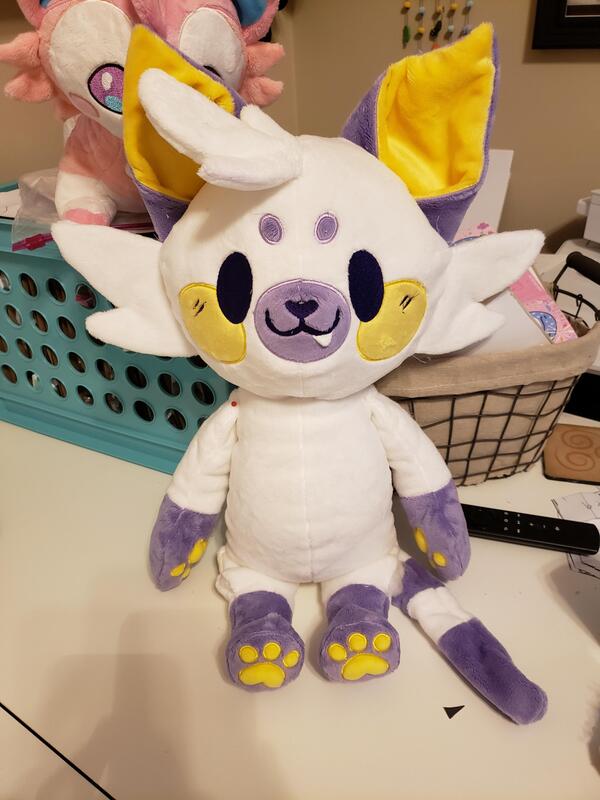
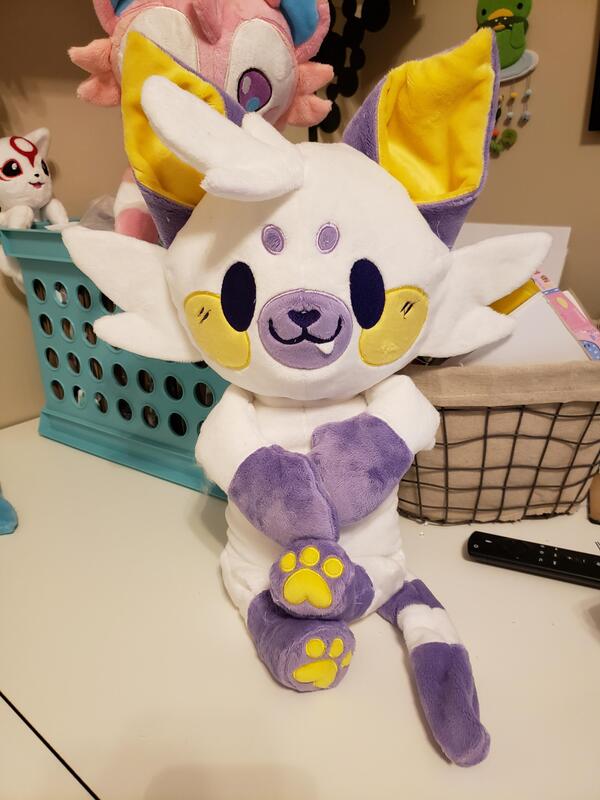
The ragdoll style was already super cute! Because of the legs being sewn into the bottom of the body, it cannot stand, but the plush is so soft and floppy as a result because the legs do not need to be overstuffed to be able to make the plush stand on its own without any wrinkles. I actually LOVE the size of this plush and decided to keep the pattern to offer in the future, but it was too small for what I wanted... 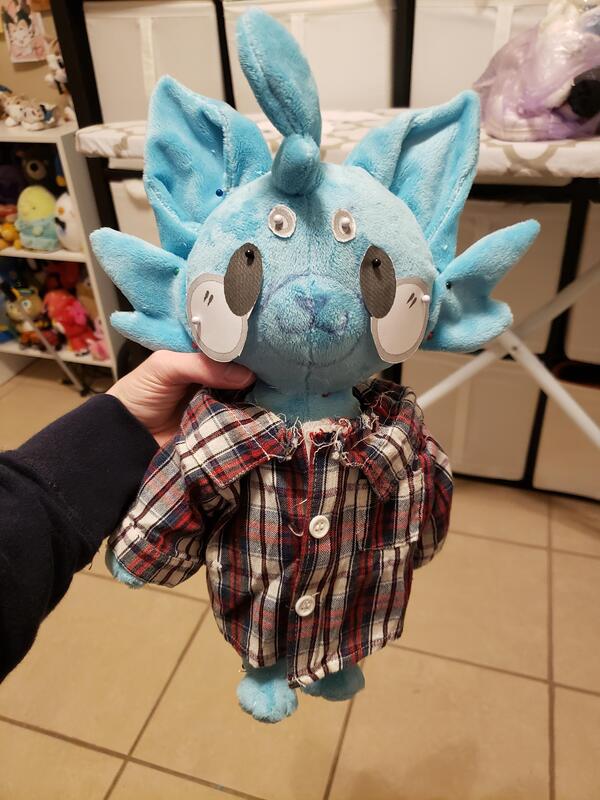 This plush is intended to fit into BaB clothes, and as you can see, it's way too small!  Before I finalized the embroidery I did a face test to check the embroidery. I needed to make some adjustments, like making the eyes and nose smaller and rotating the eyebrows a bit.  Mochi beans! 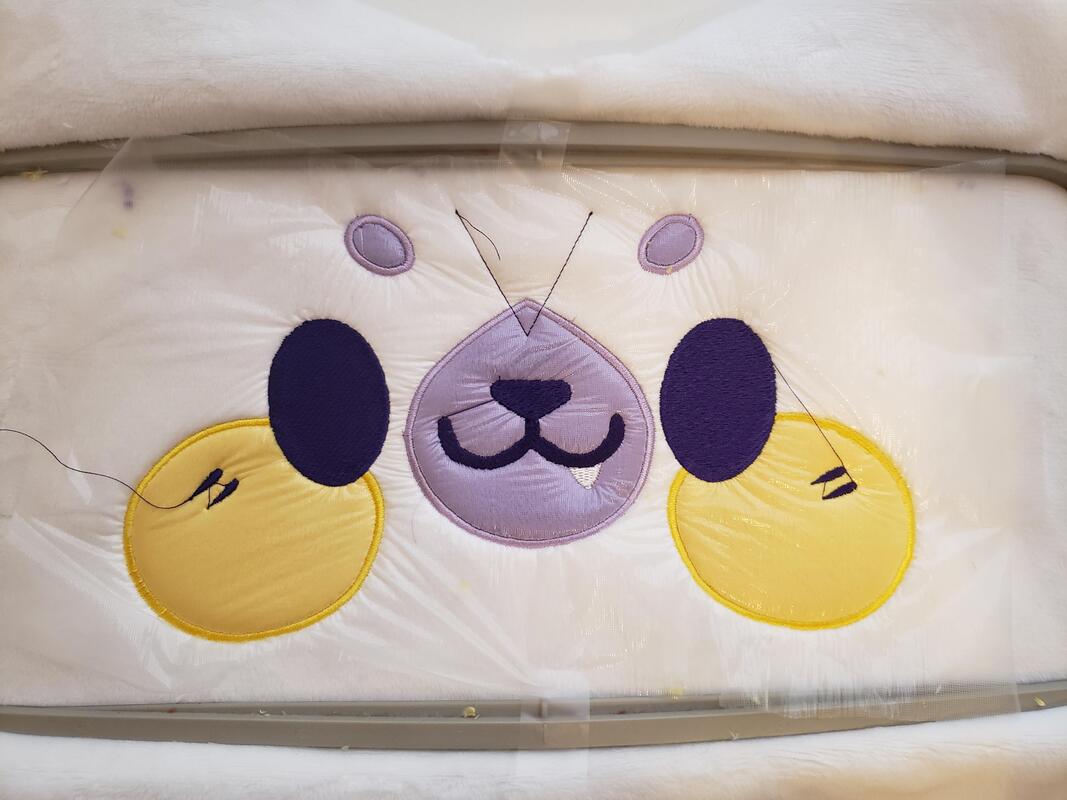 Face embroidery! 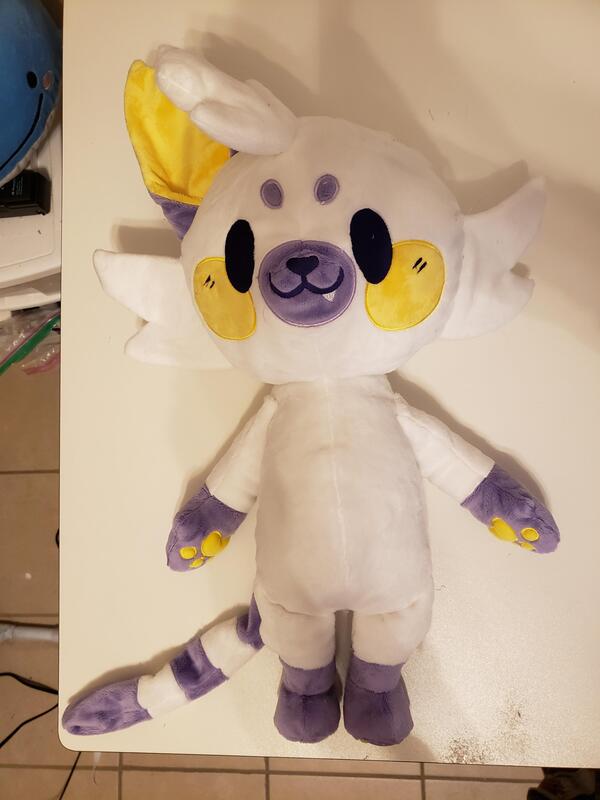 Like every single plush I make, their head came out too big despite making tests. It's just a curse that I have! So it needed to be resized.
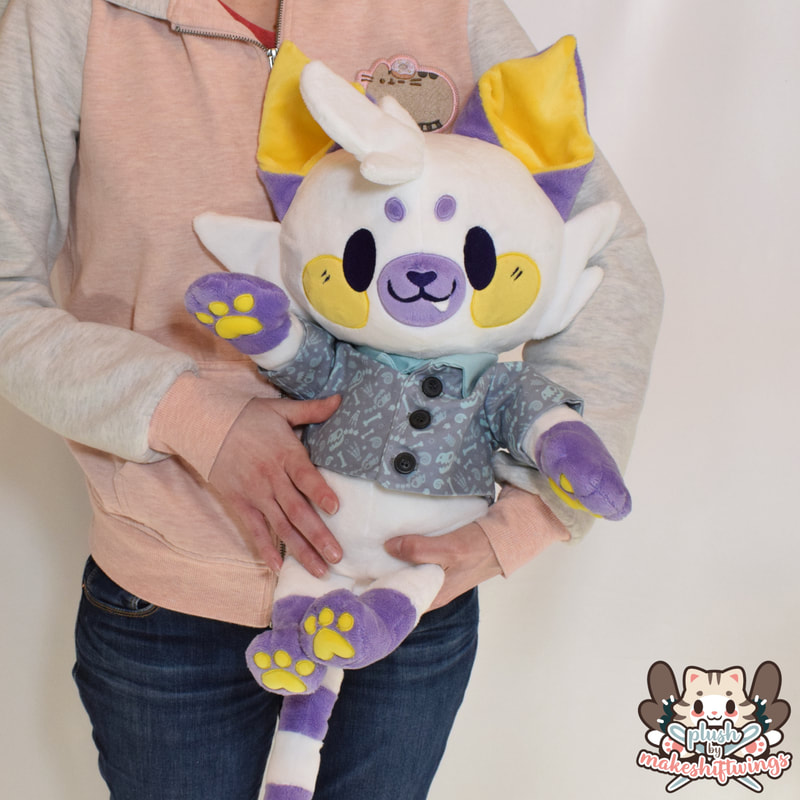
Besides remaking their head, they came together pretty easily! With them stuffed soft and floppy, and having flexible legs, they can hold some cute poses!
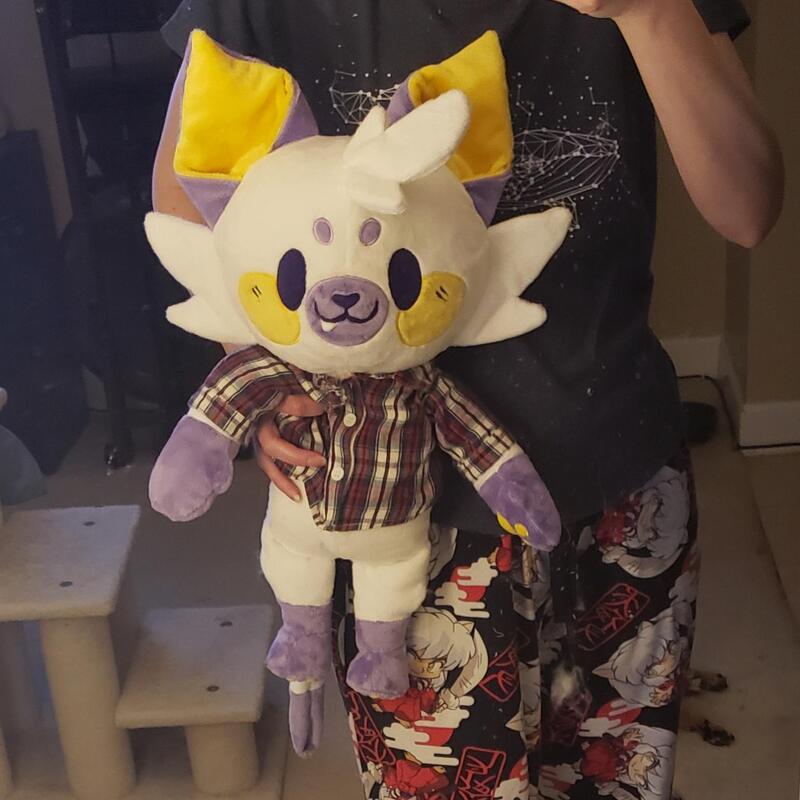
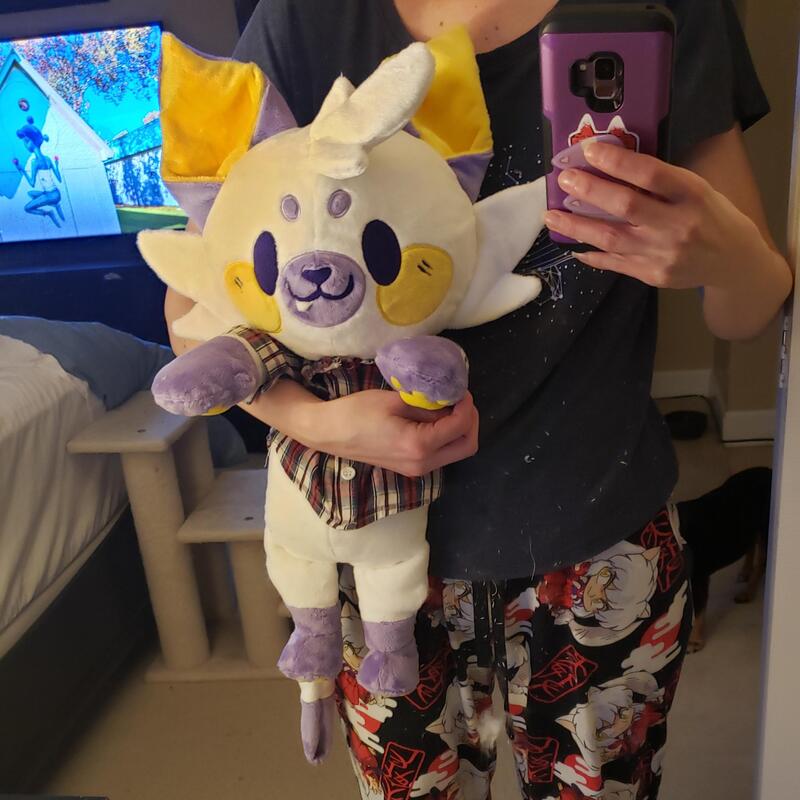
They are just so much larger to fit into the BaB tops! And gosh, I just love how sweet they look! 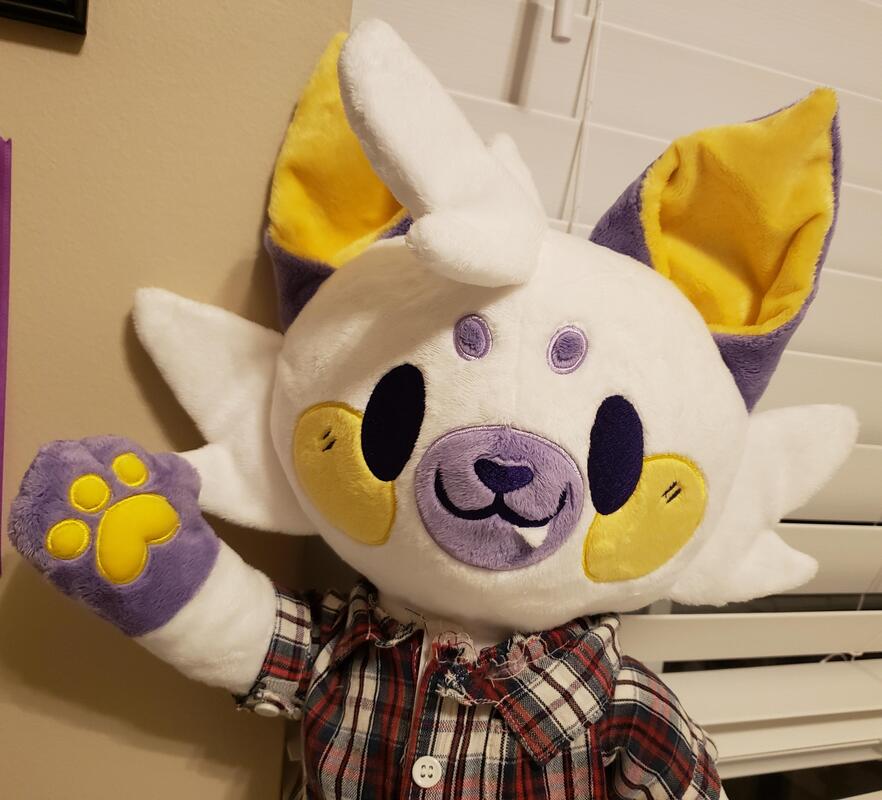 Their arms are also jointed for posing!
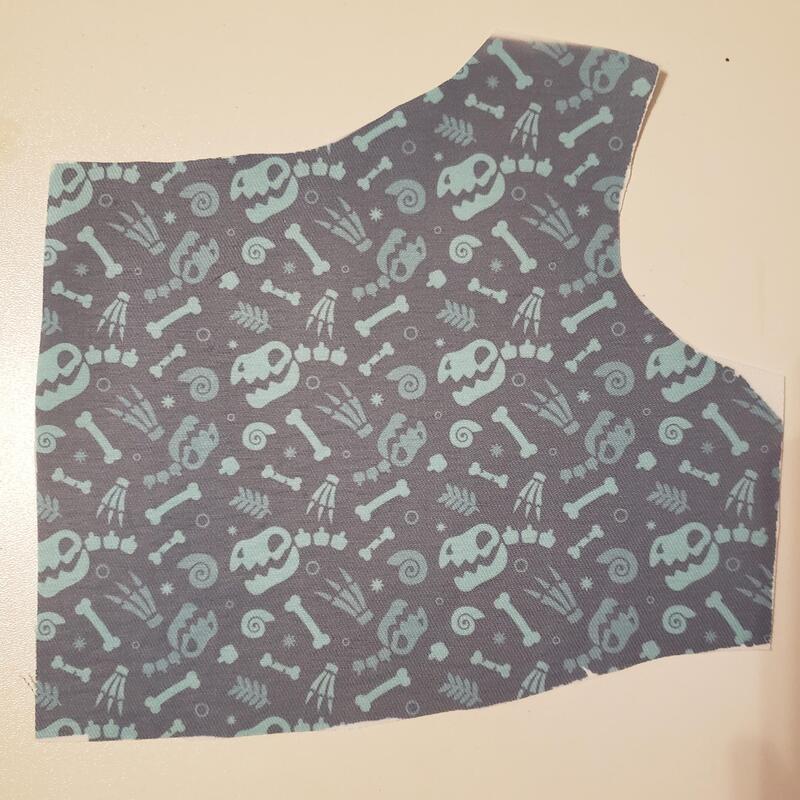
Aubry designed the pattern for Taro's shirt, which I made with my at-home sublimation setup!
Because I don't have a custom ICC profile for my setup, I had to play with the colors quite a bit to get them to print out right. I also tried putting it onto non-polyesters for fun (the bottom 4). Unfortunately I couldn't get them spot on to the art, and they came out more dull. I'm not sure if I'm capable of getting such bright colors without a proper ICC file. But, it still looked cute! 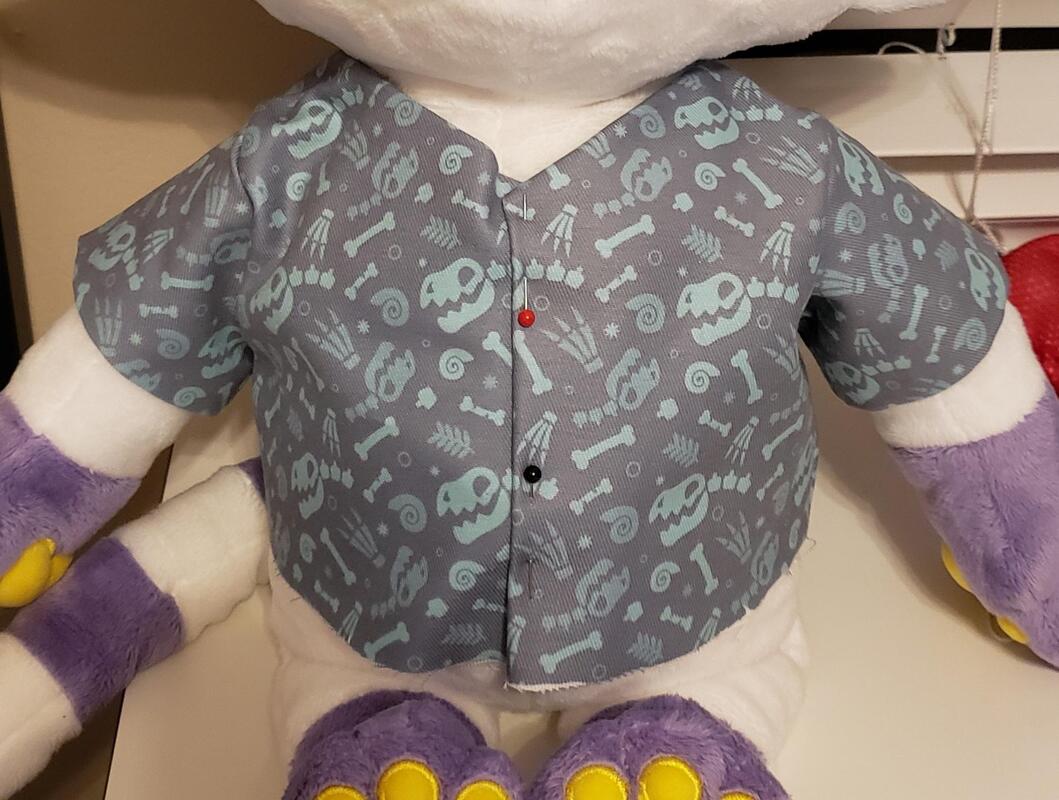 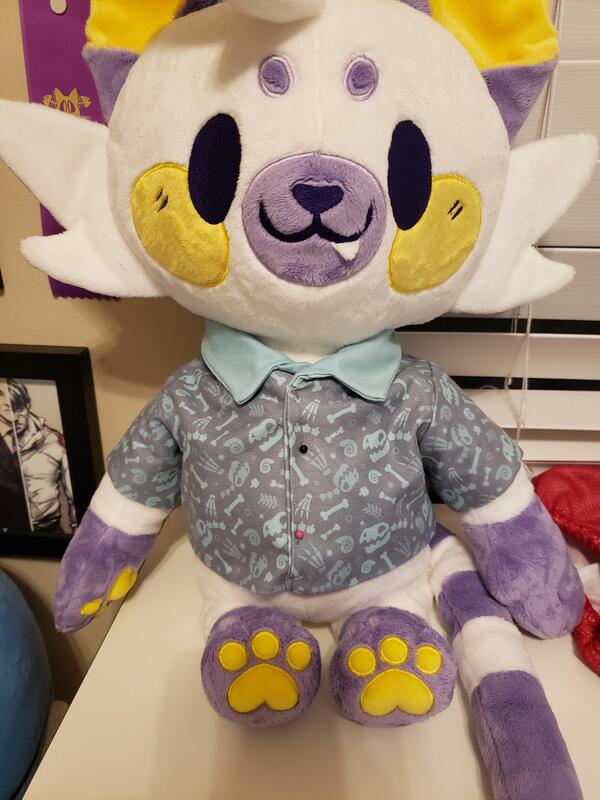 The shirt is lined with the same fabric since sublimation only dyes the front of the fabric and not the backside, too. After the buttons were sewn on, Taro was all done!
0 Comments
Leave a Reply. |
Archives
December 2022
Categories
All
|


 RSS Feed